
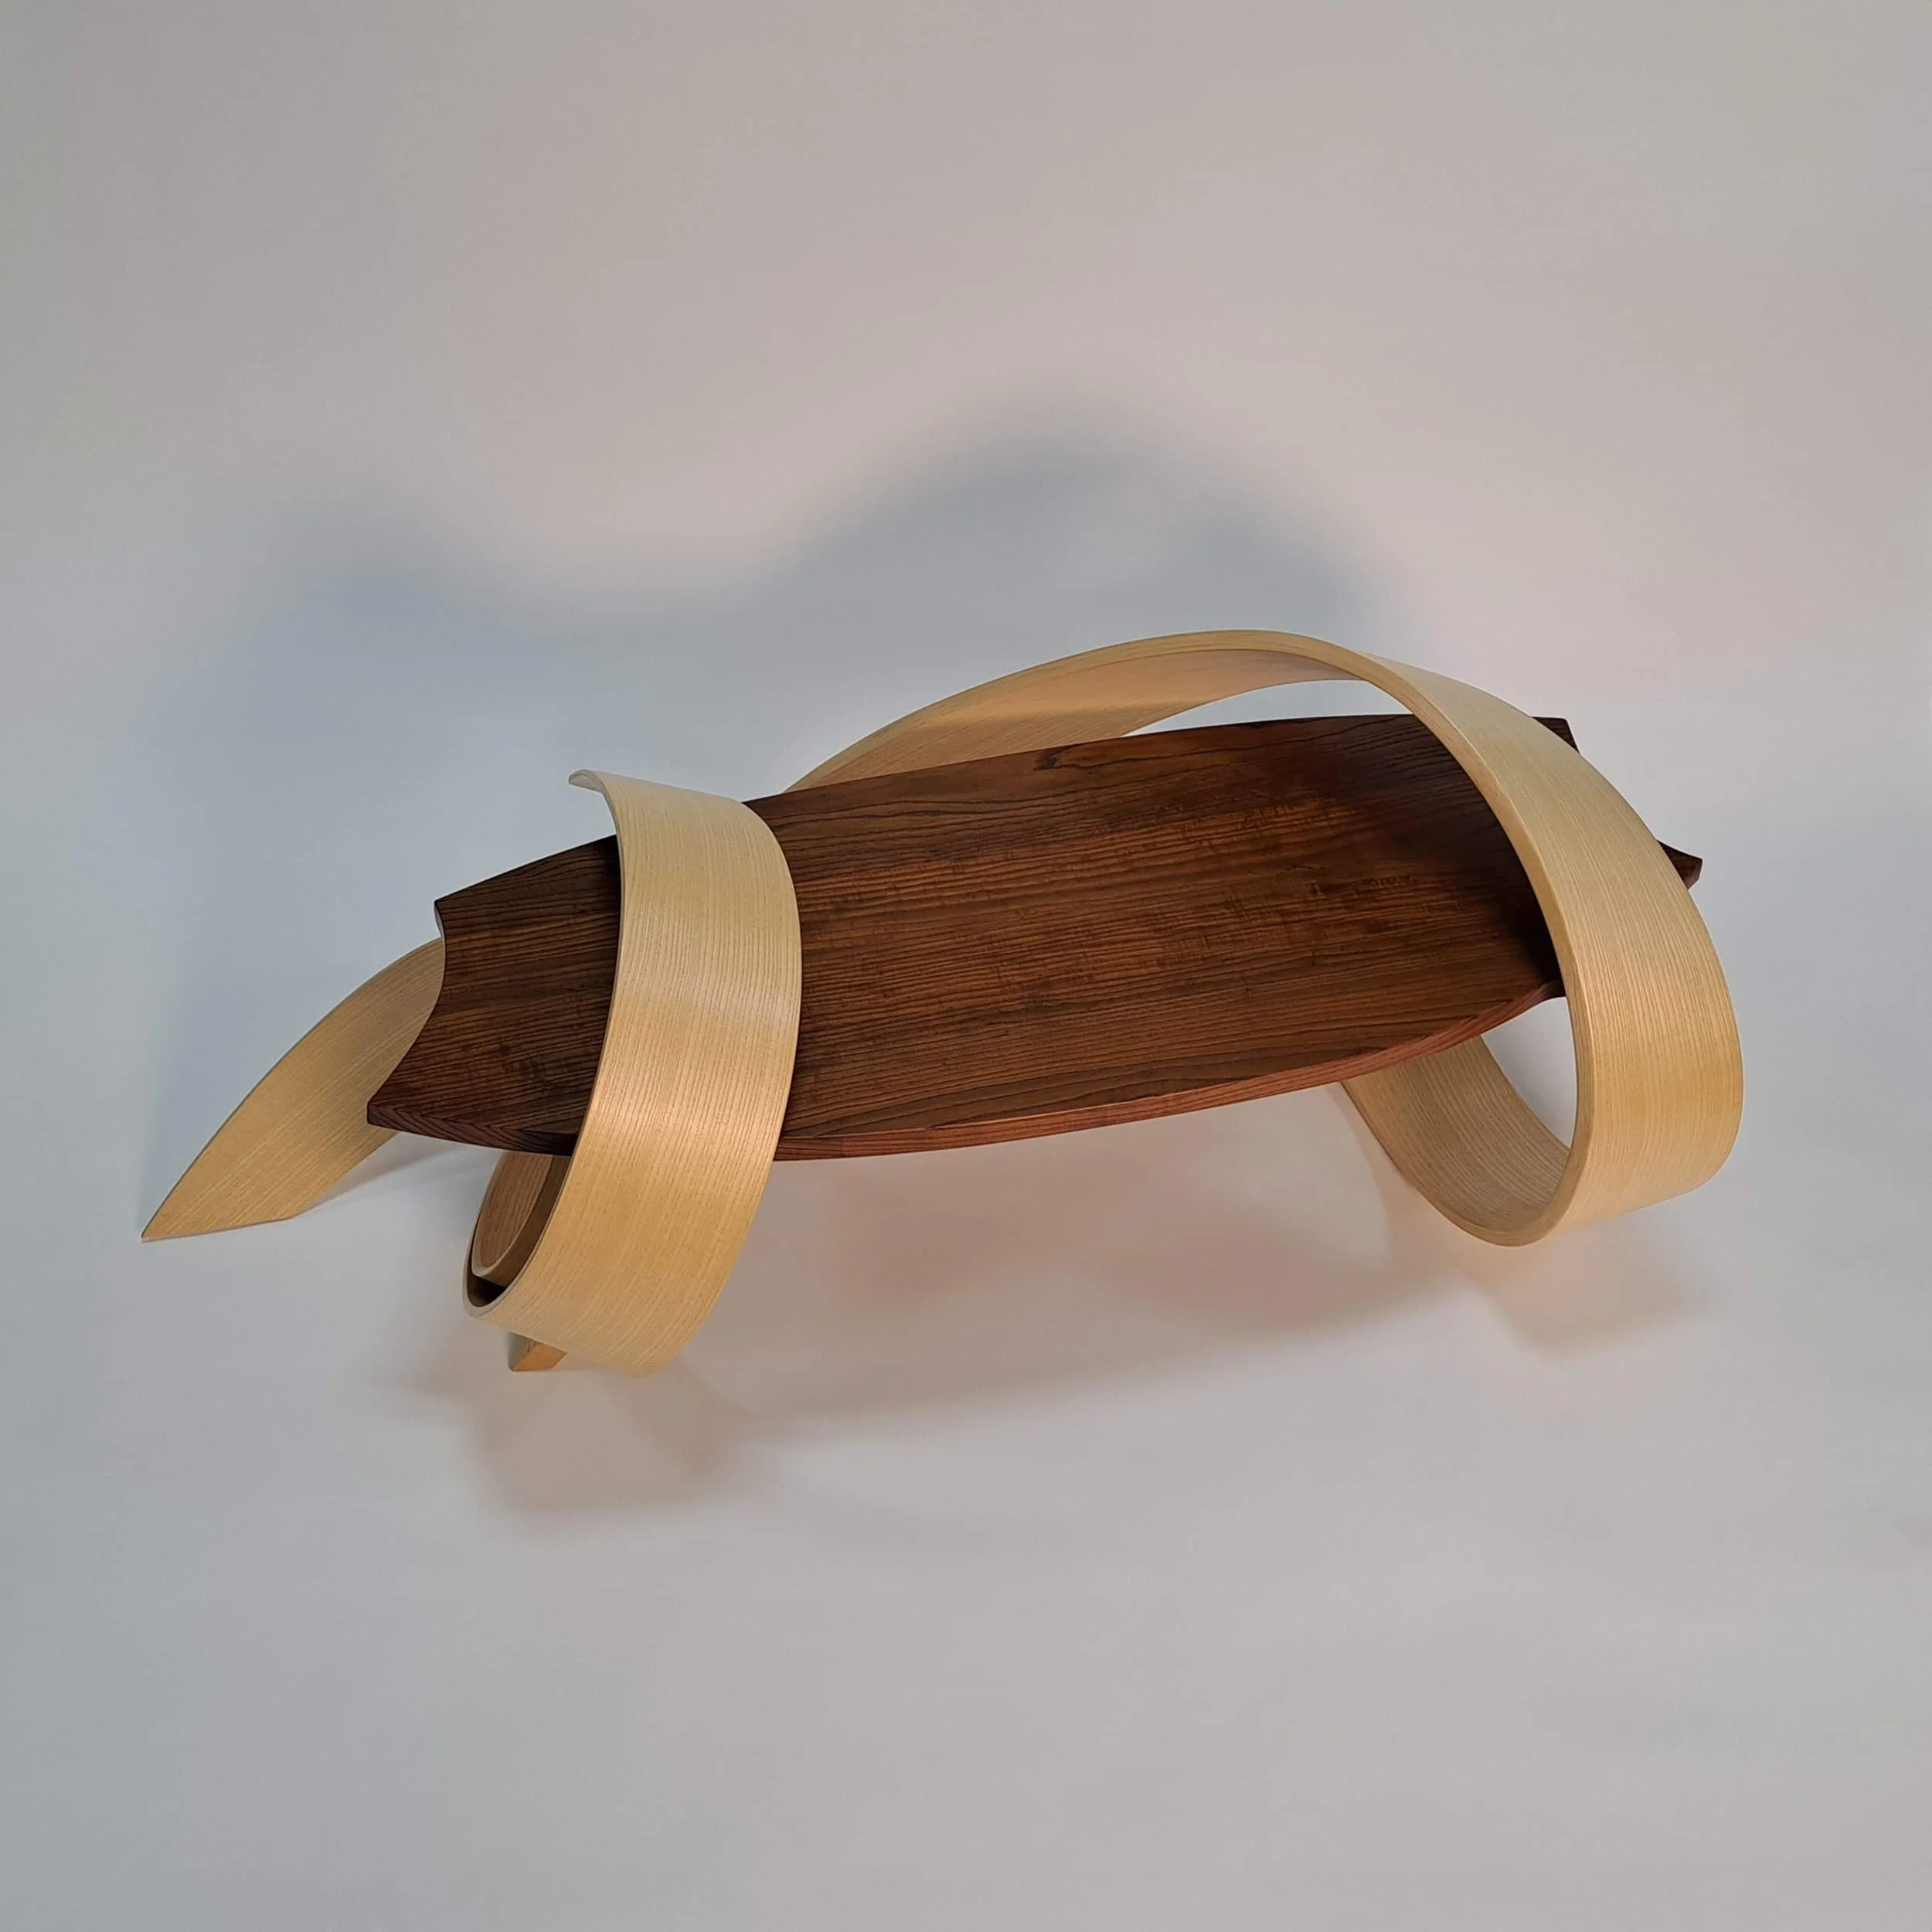
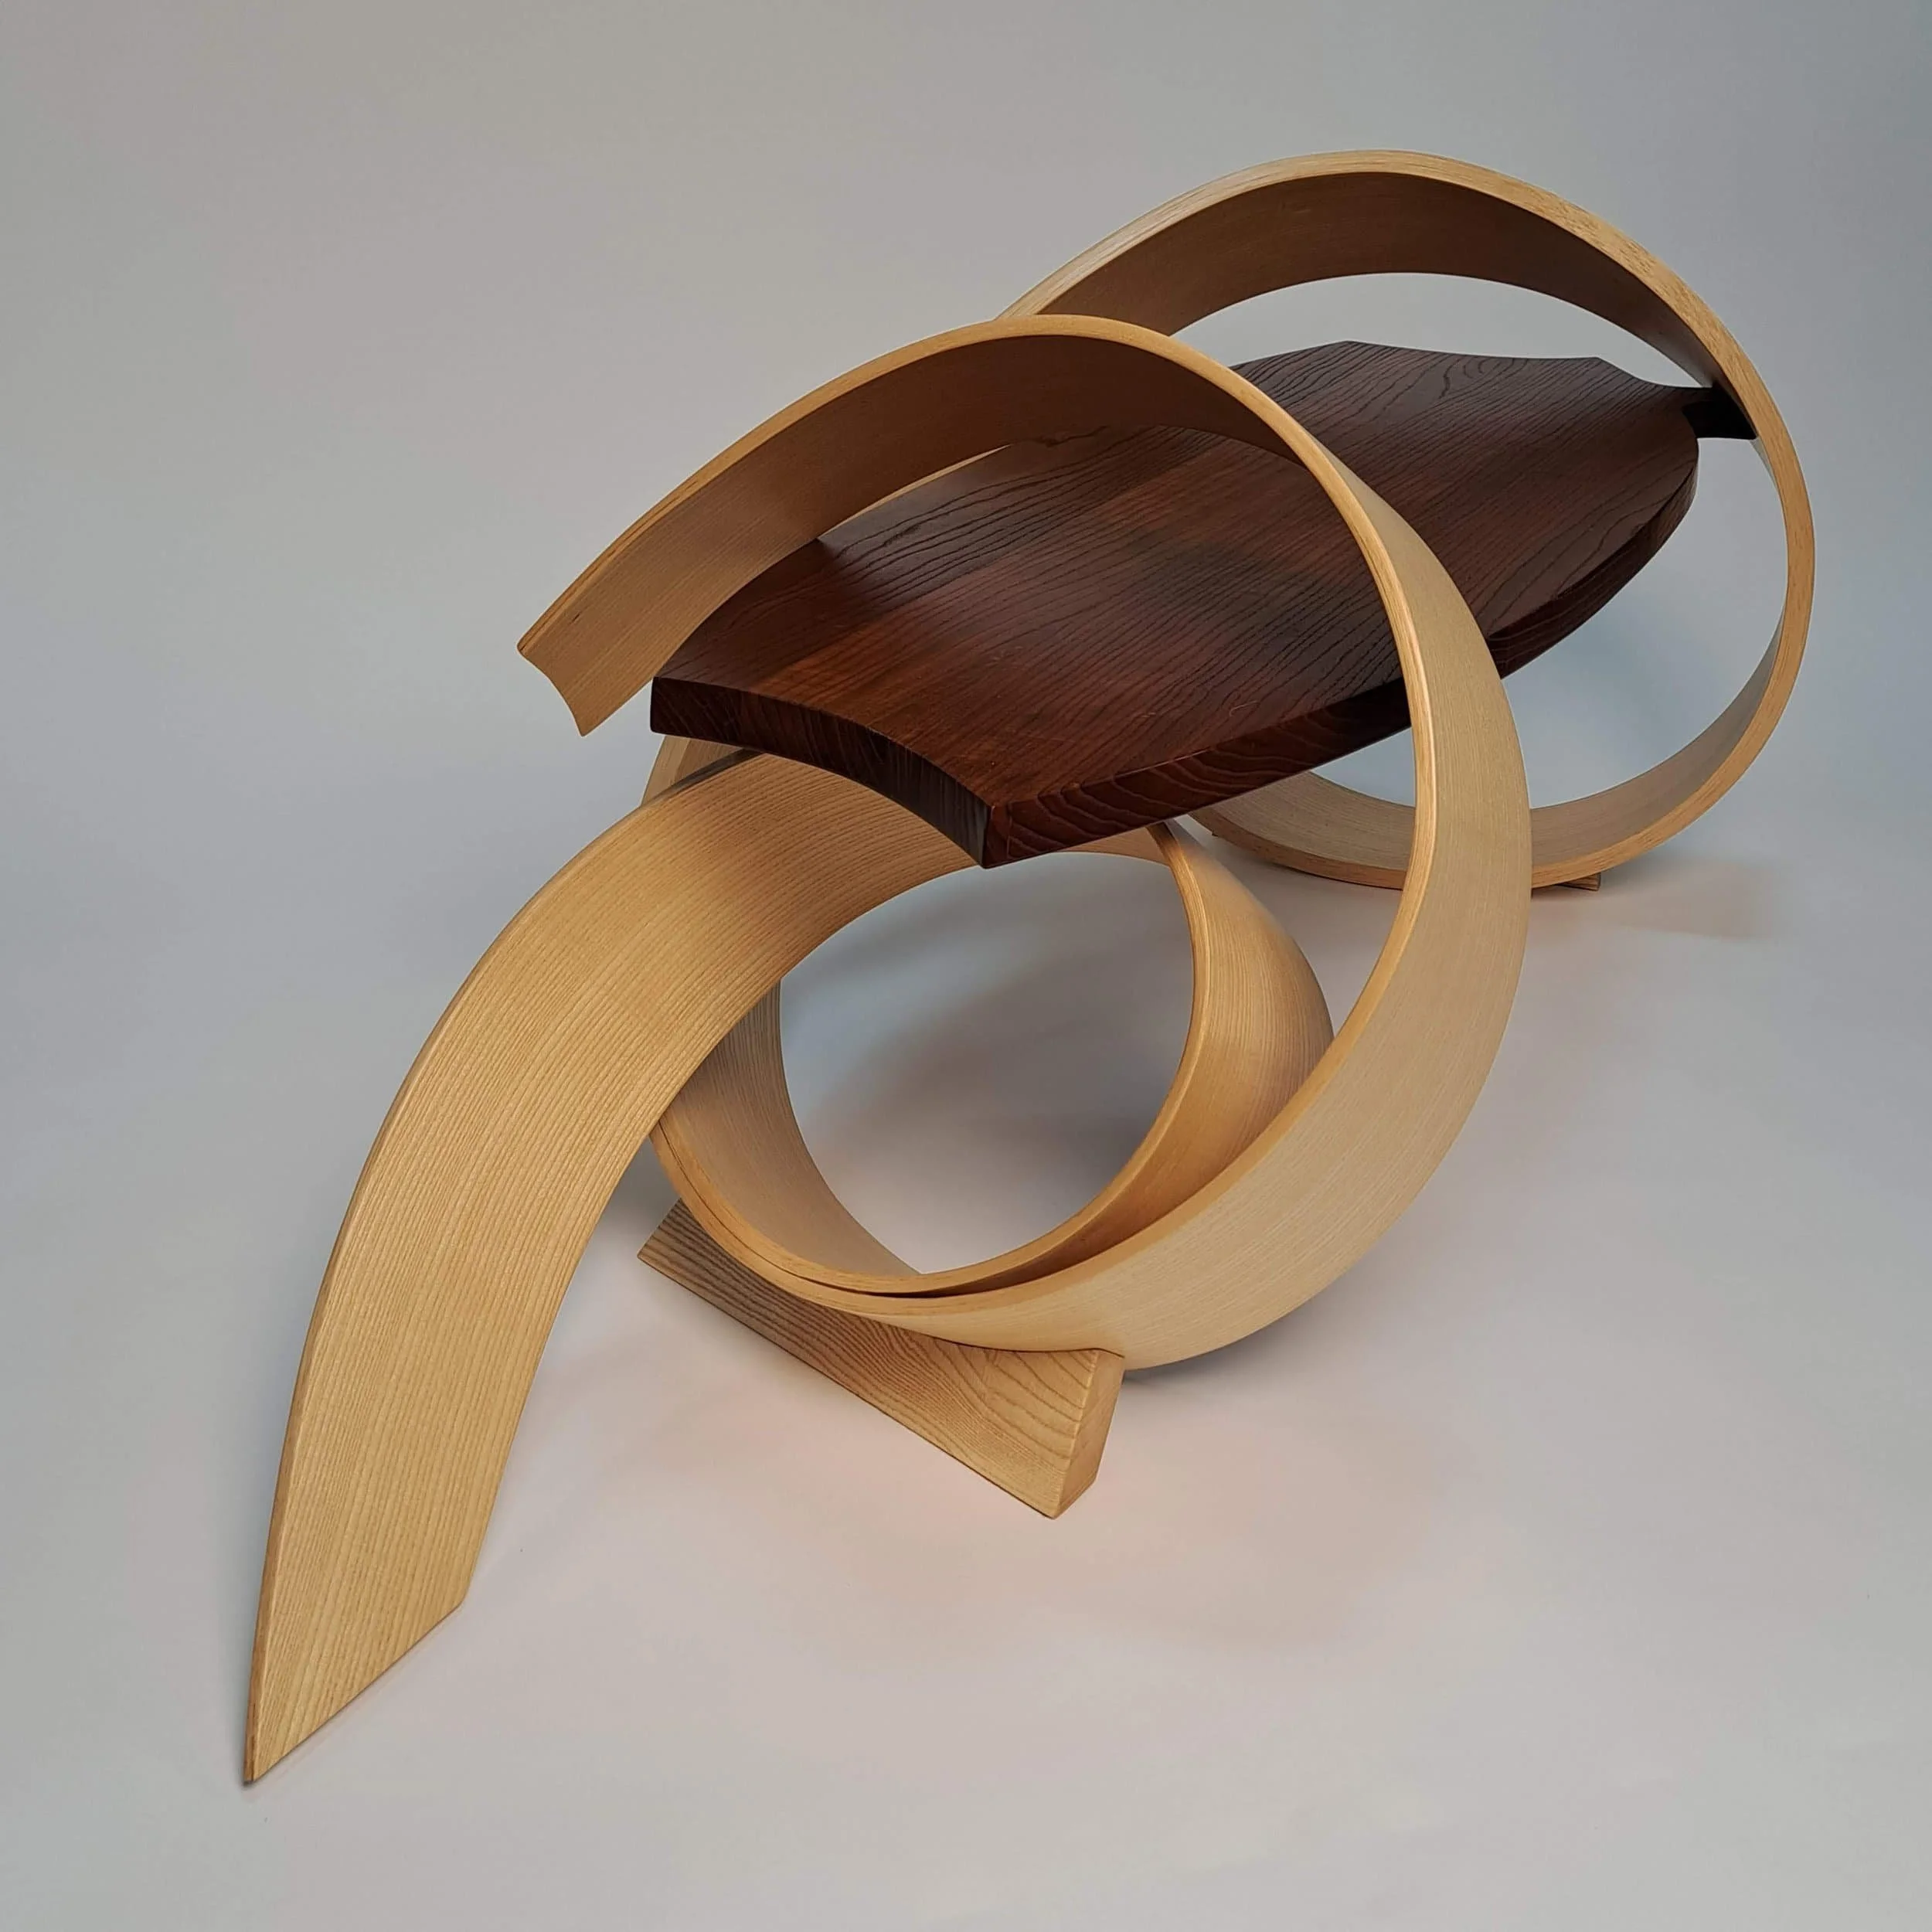
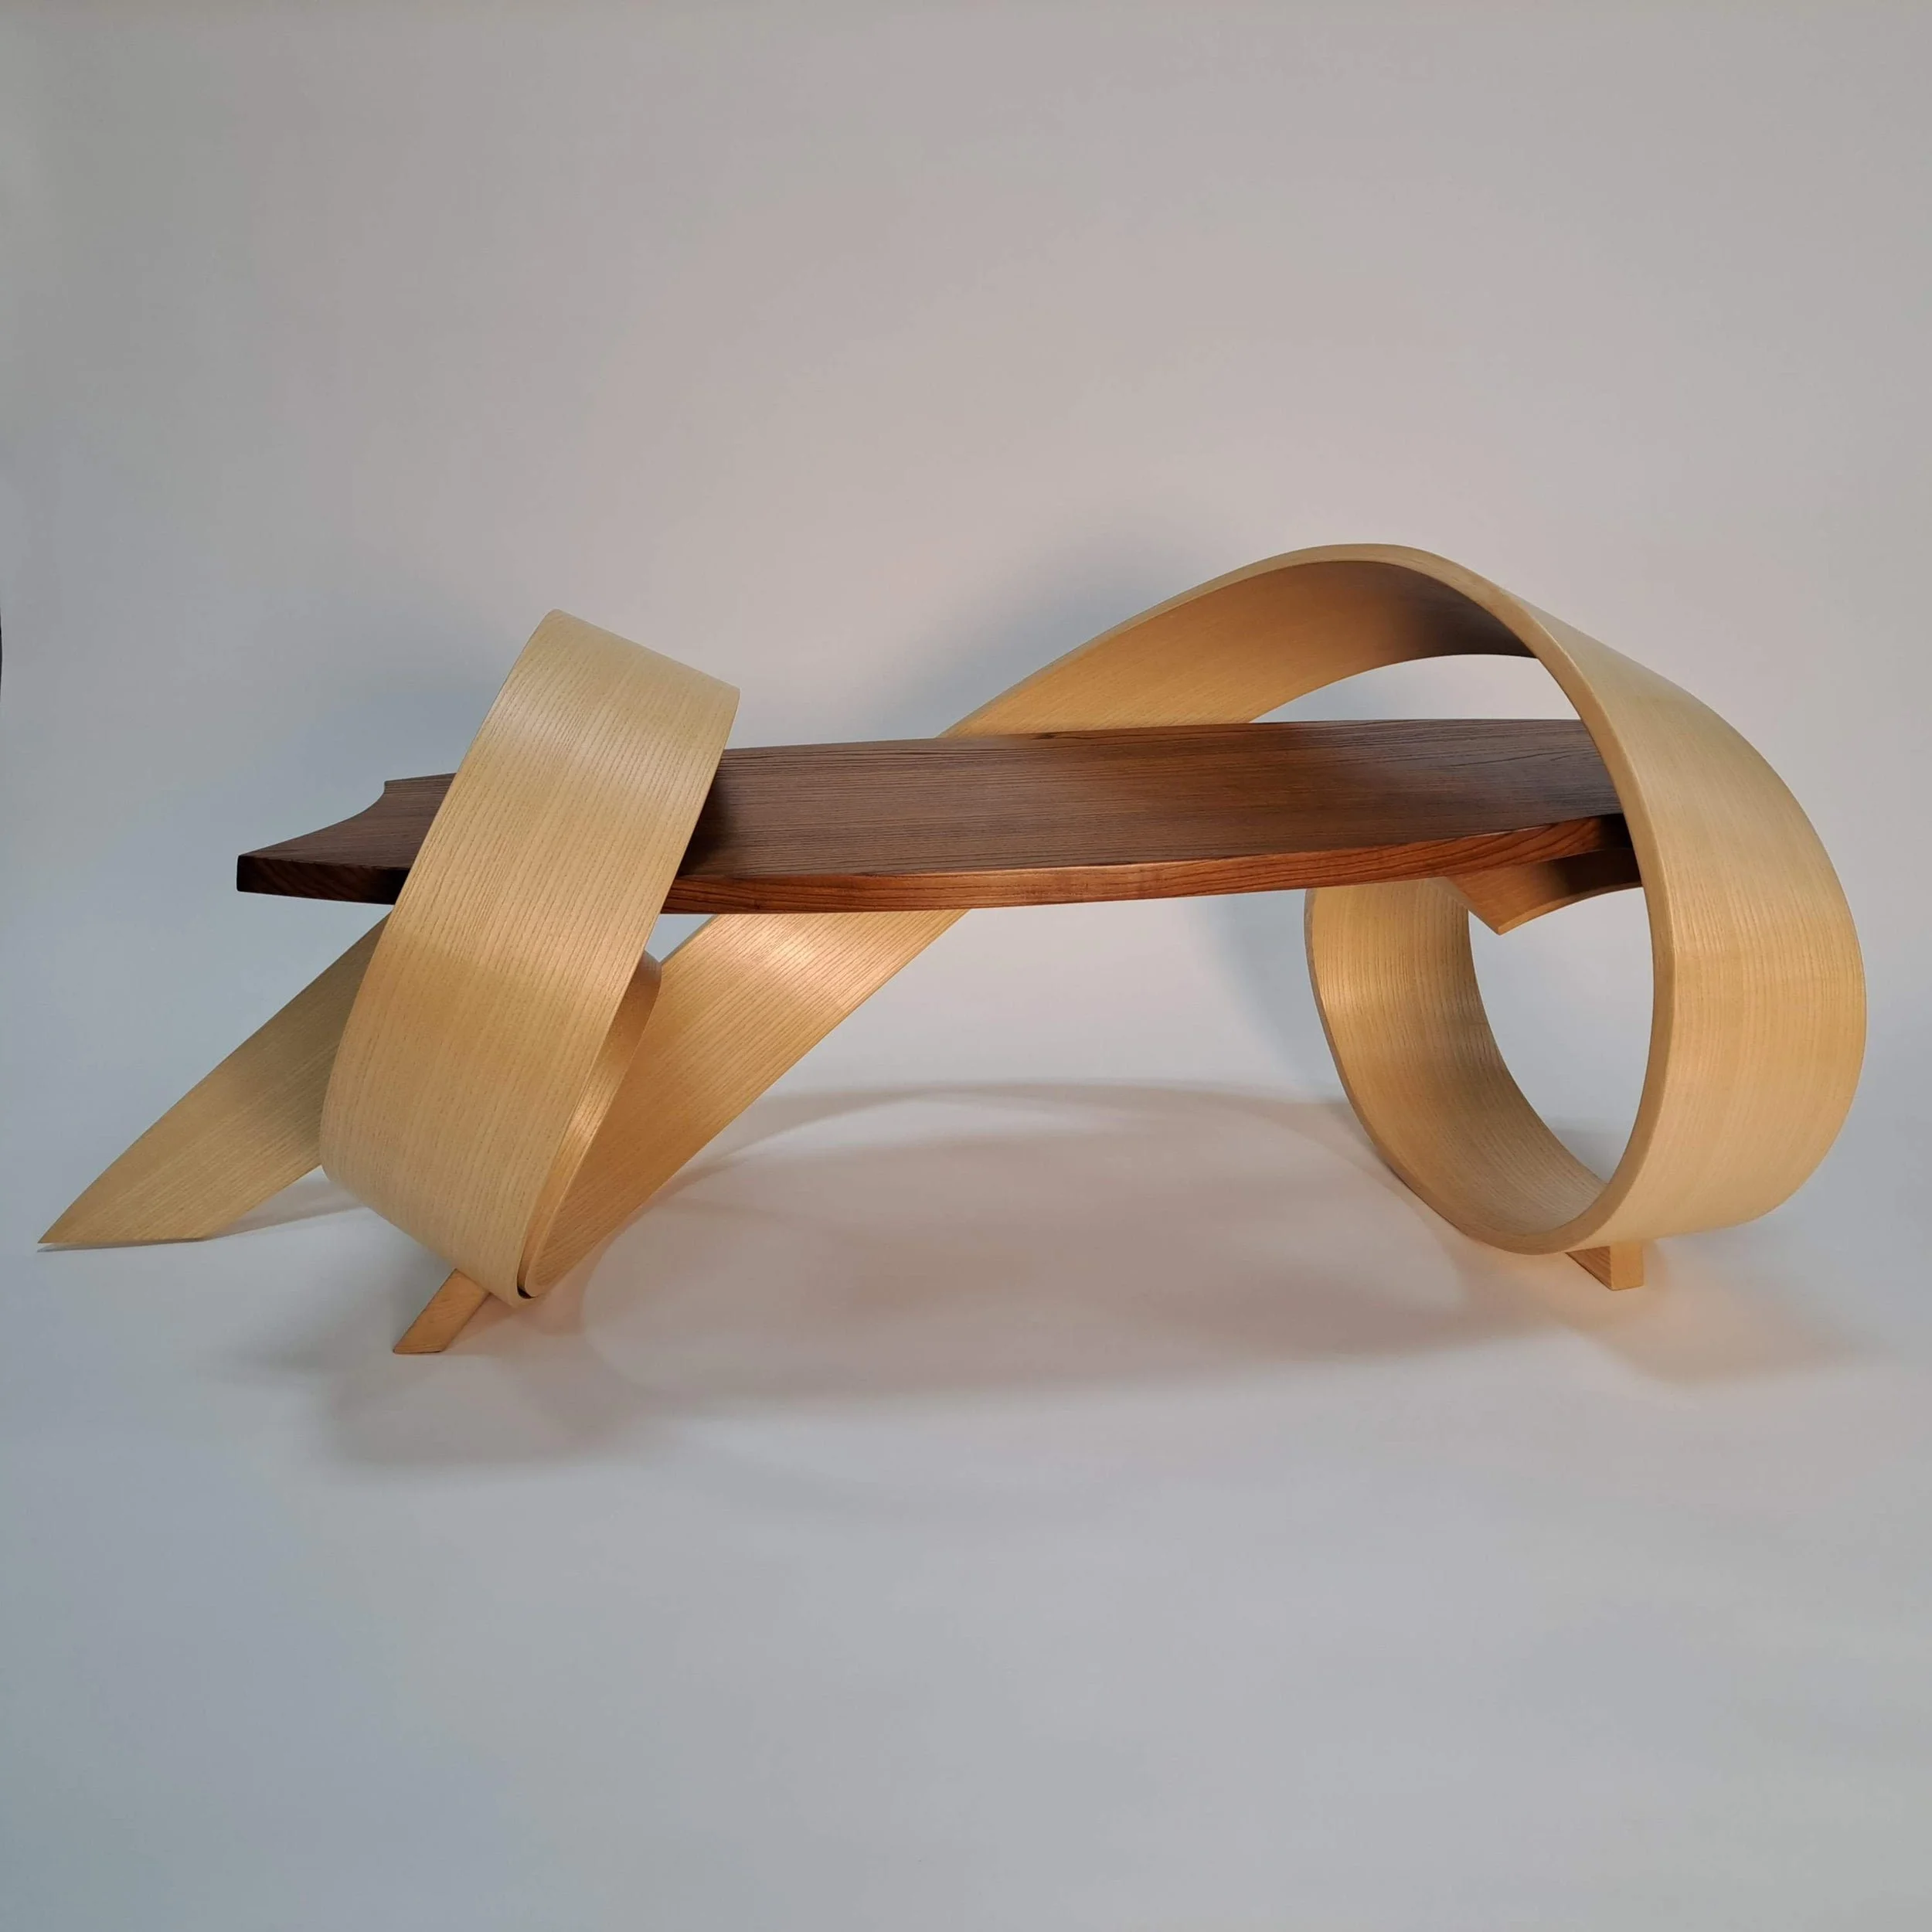
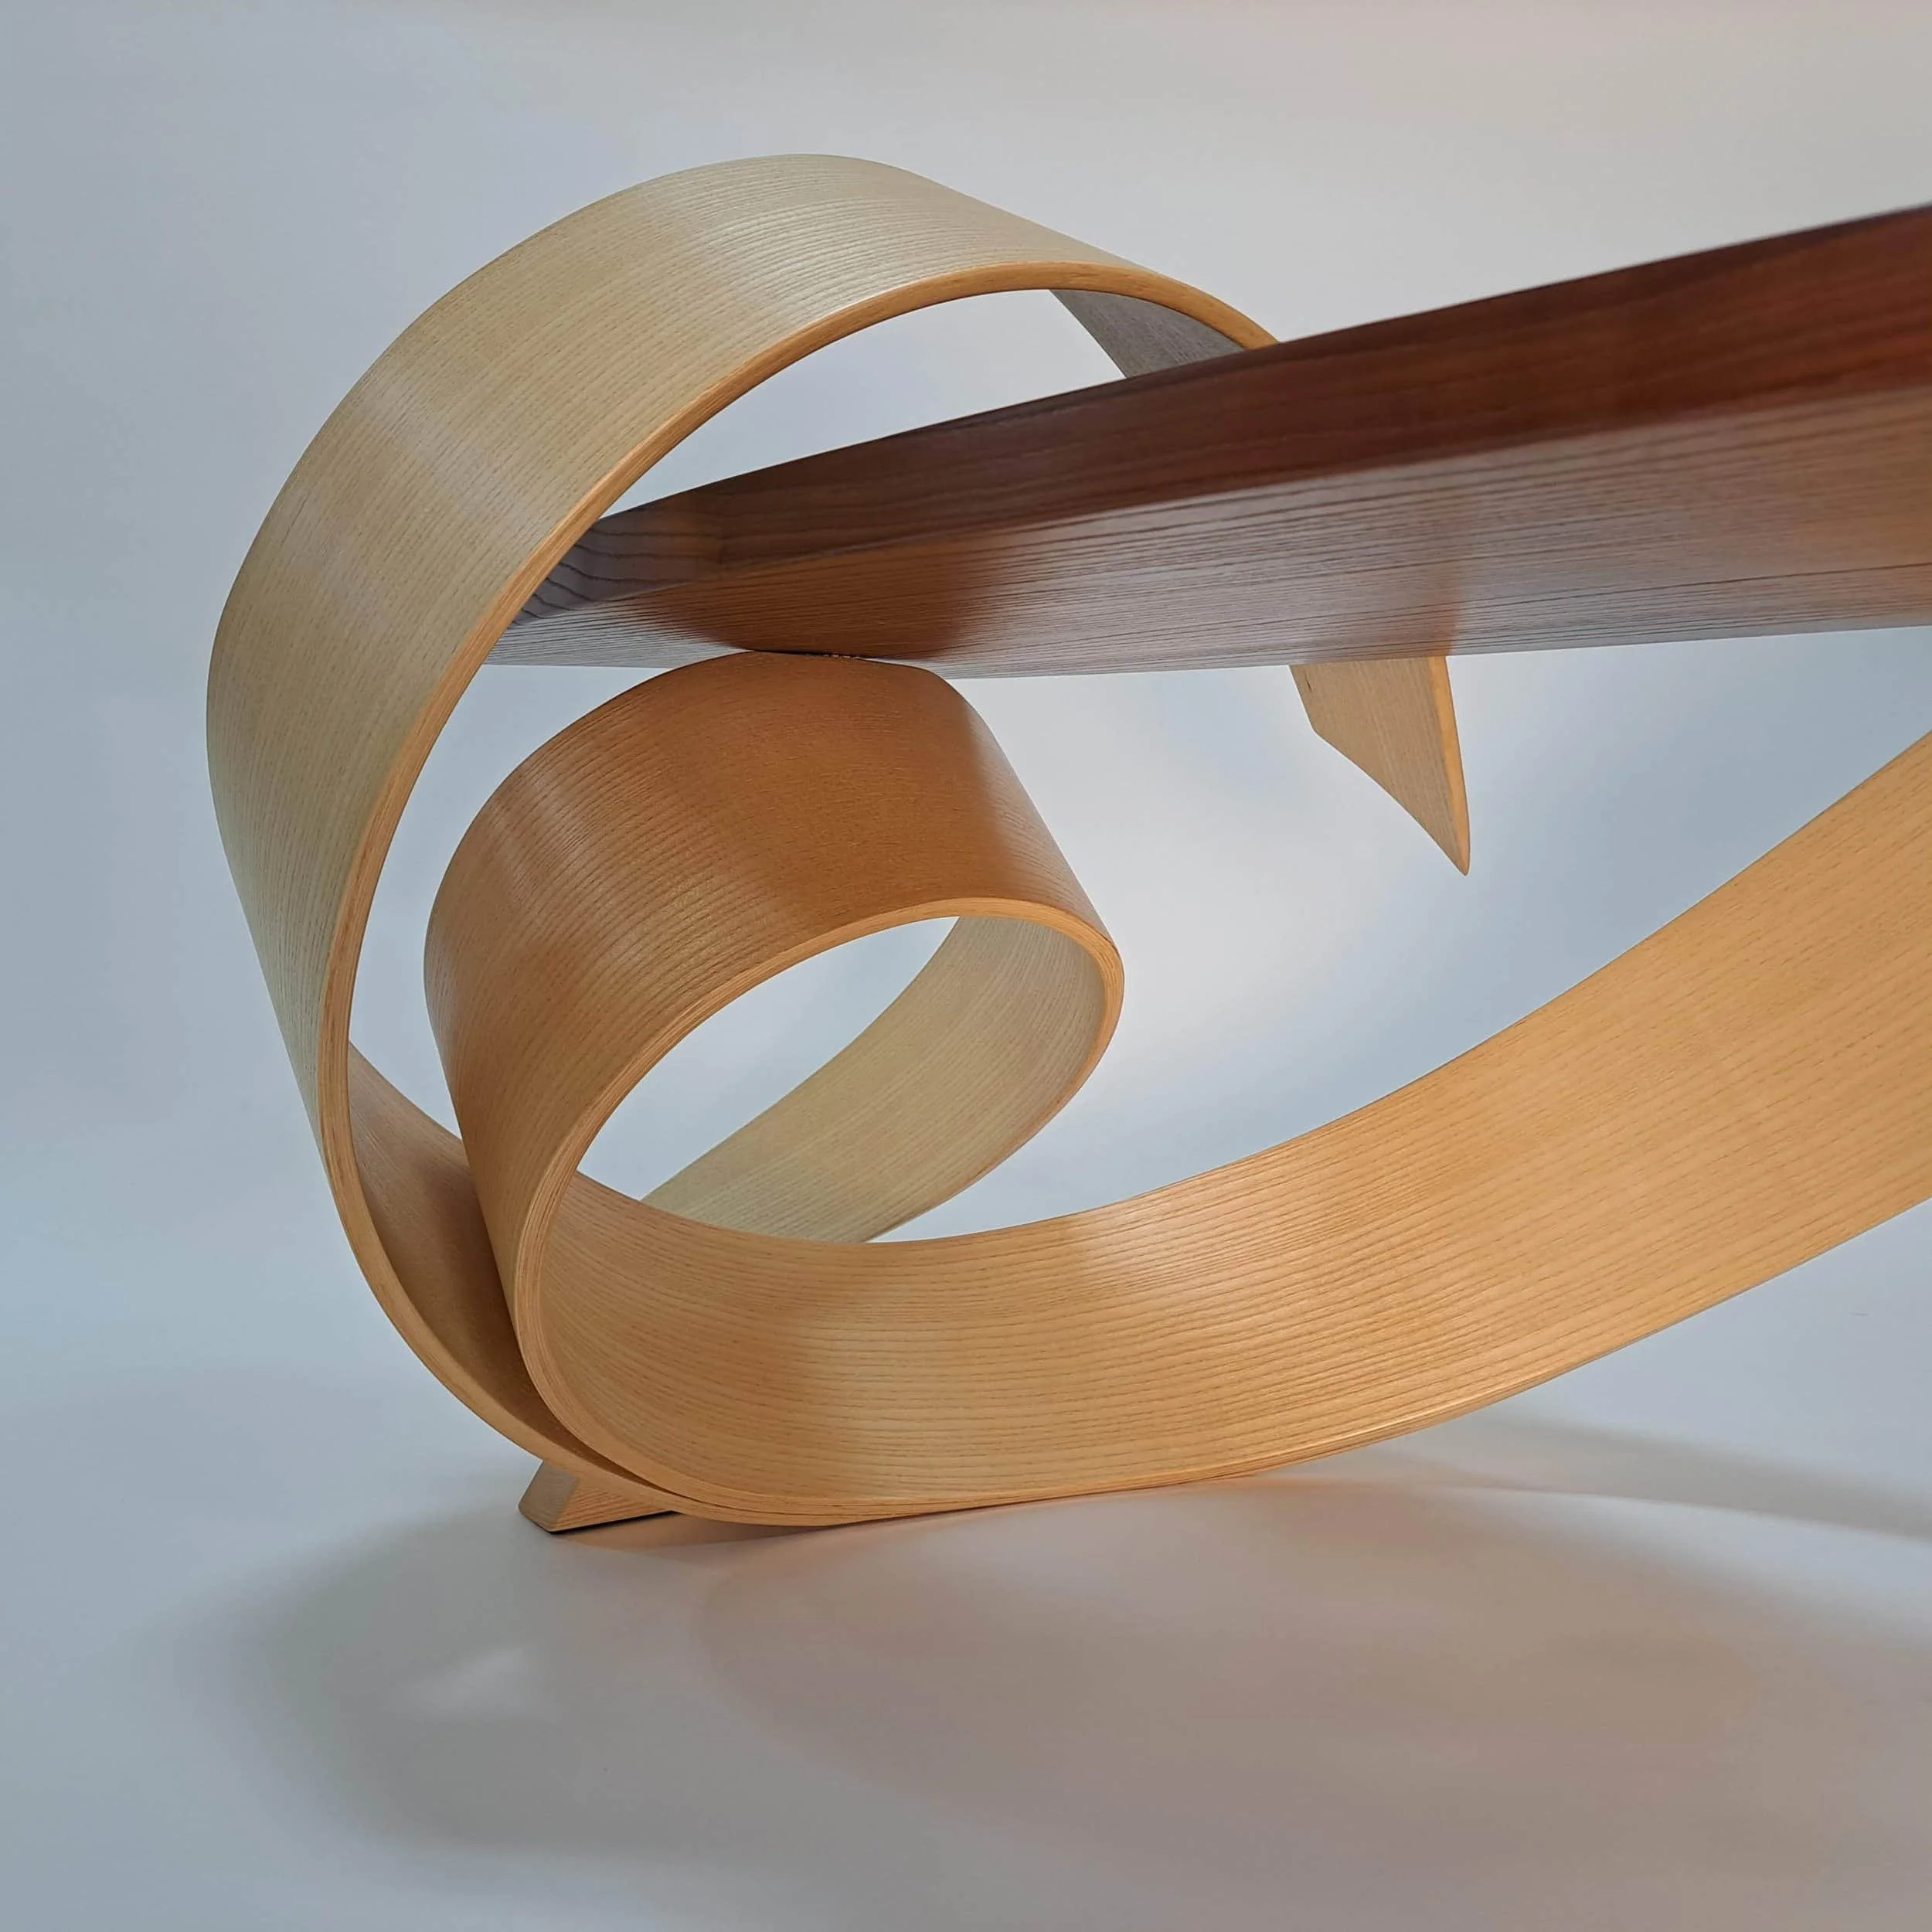
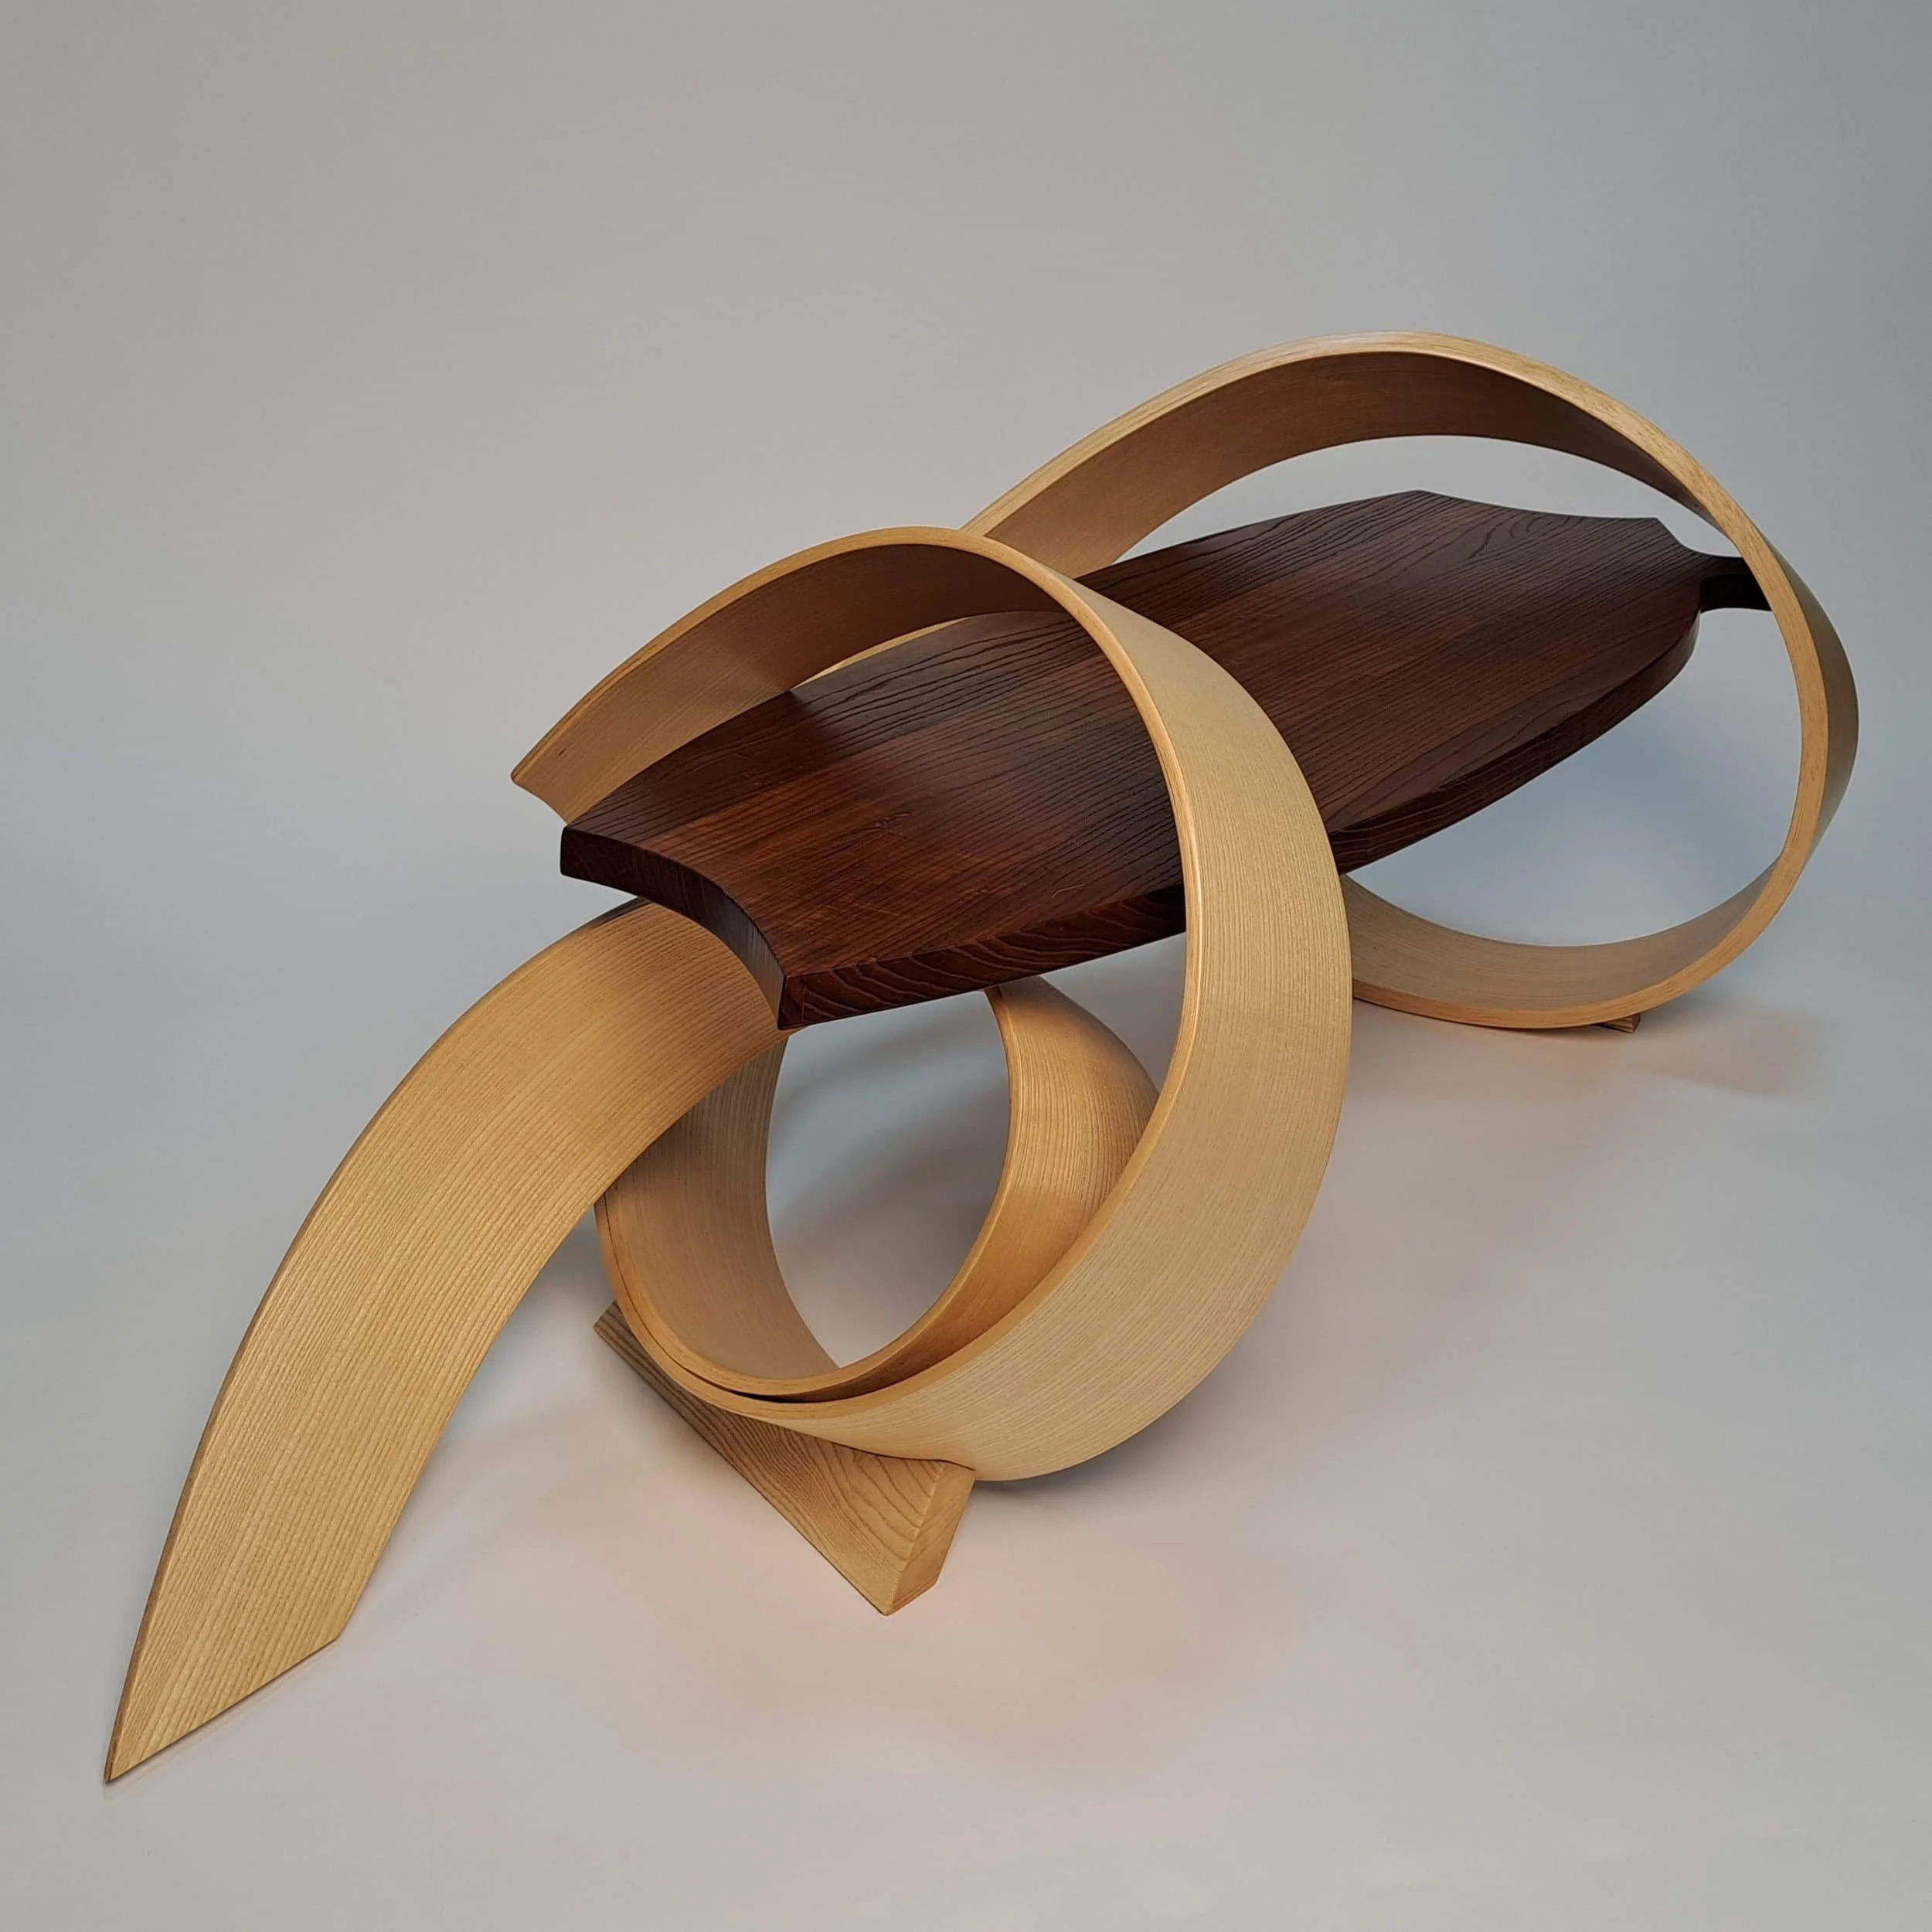
Whip-it Freeform Bent Lamination Ash Bench
About The Project
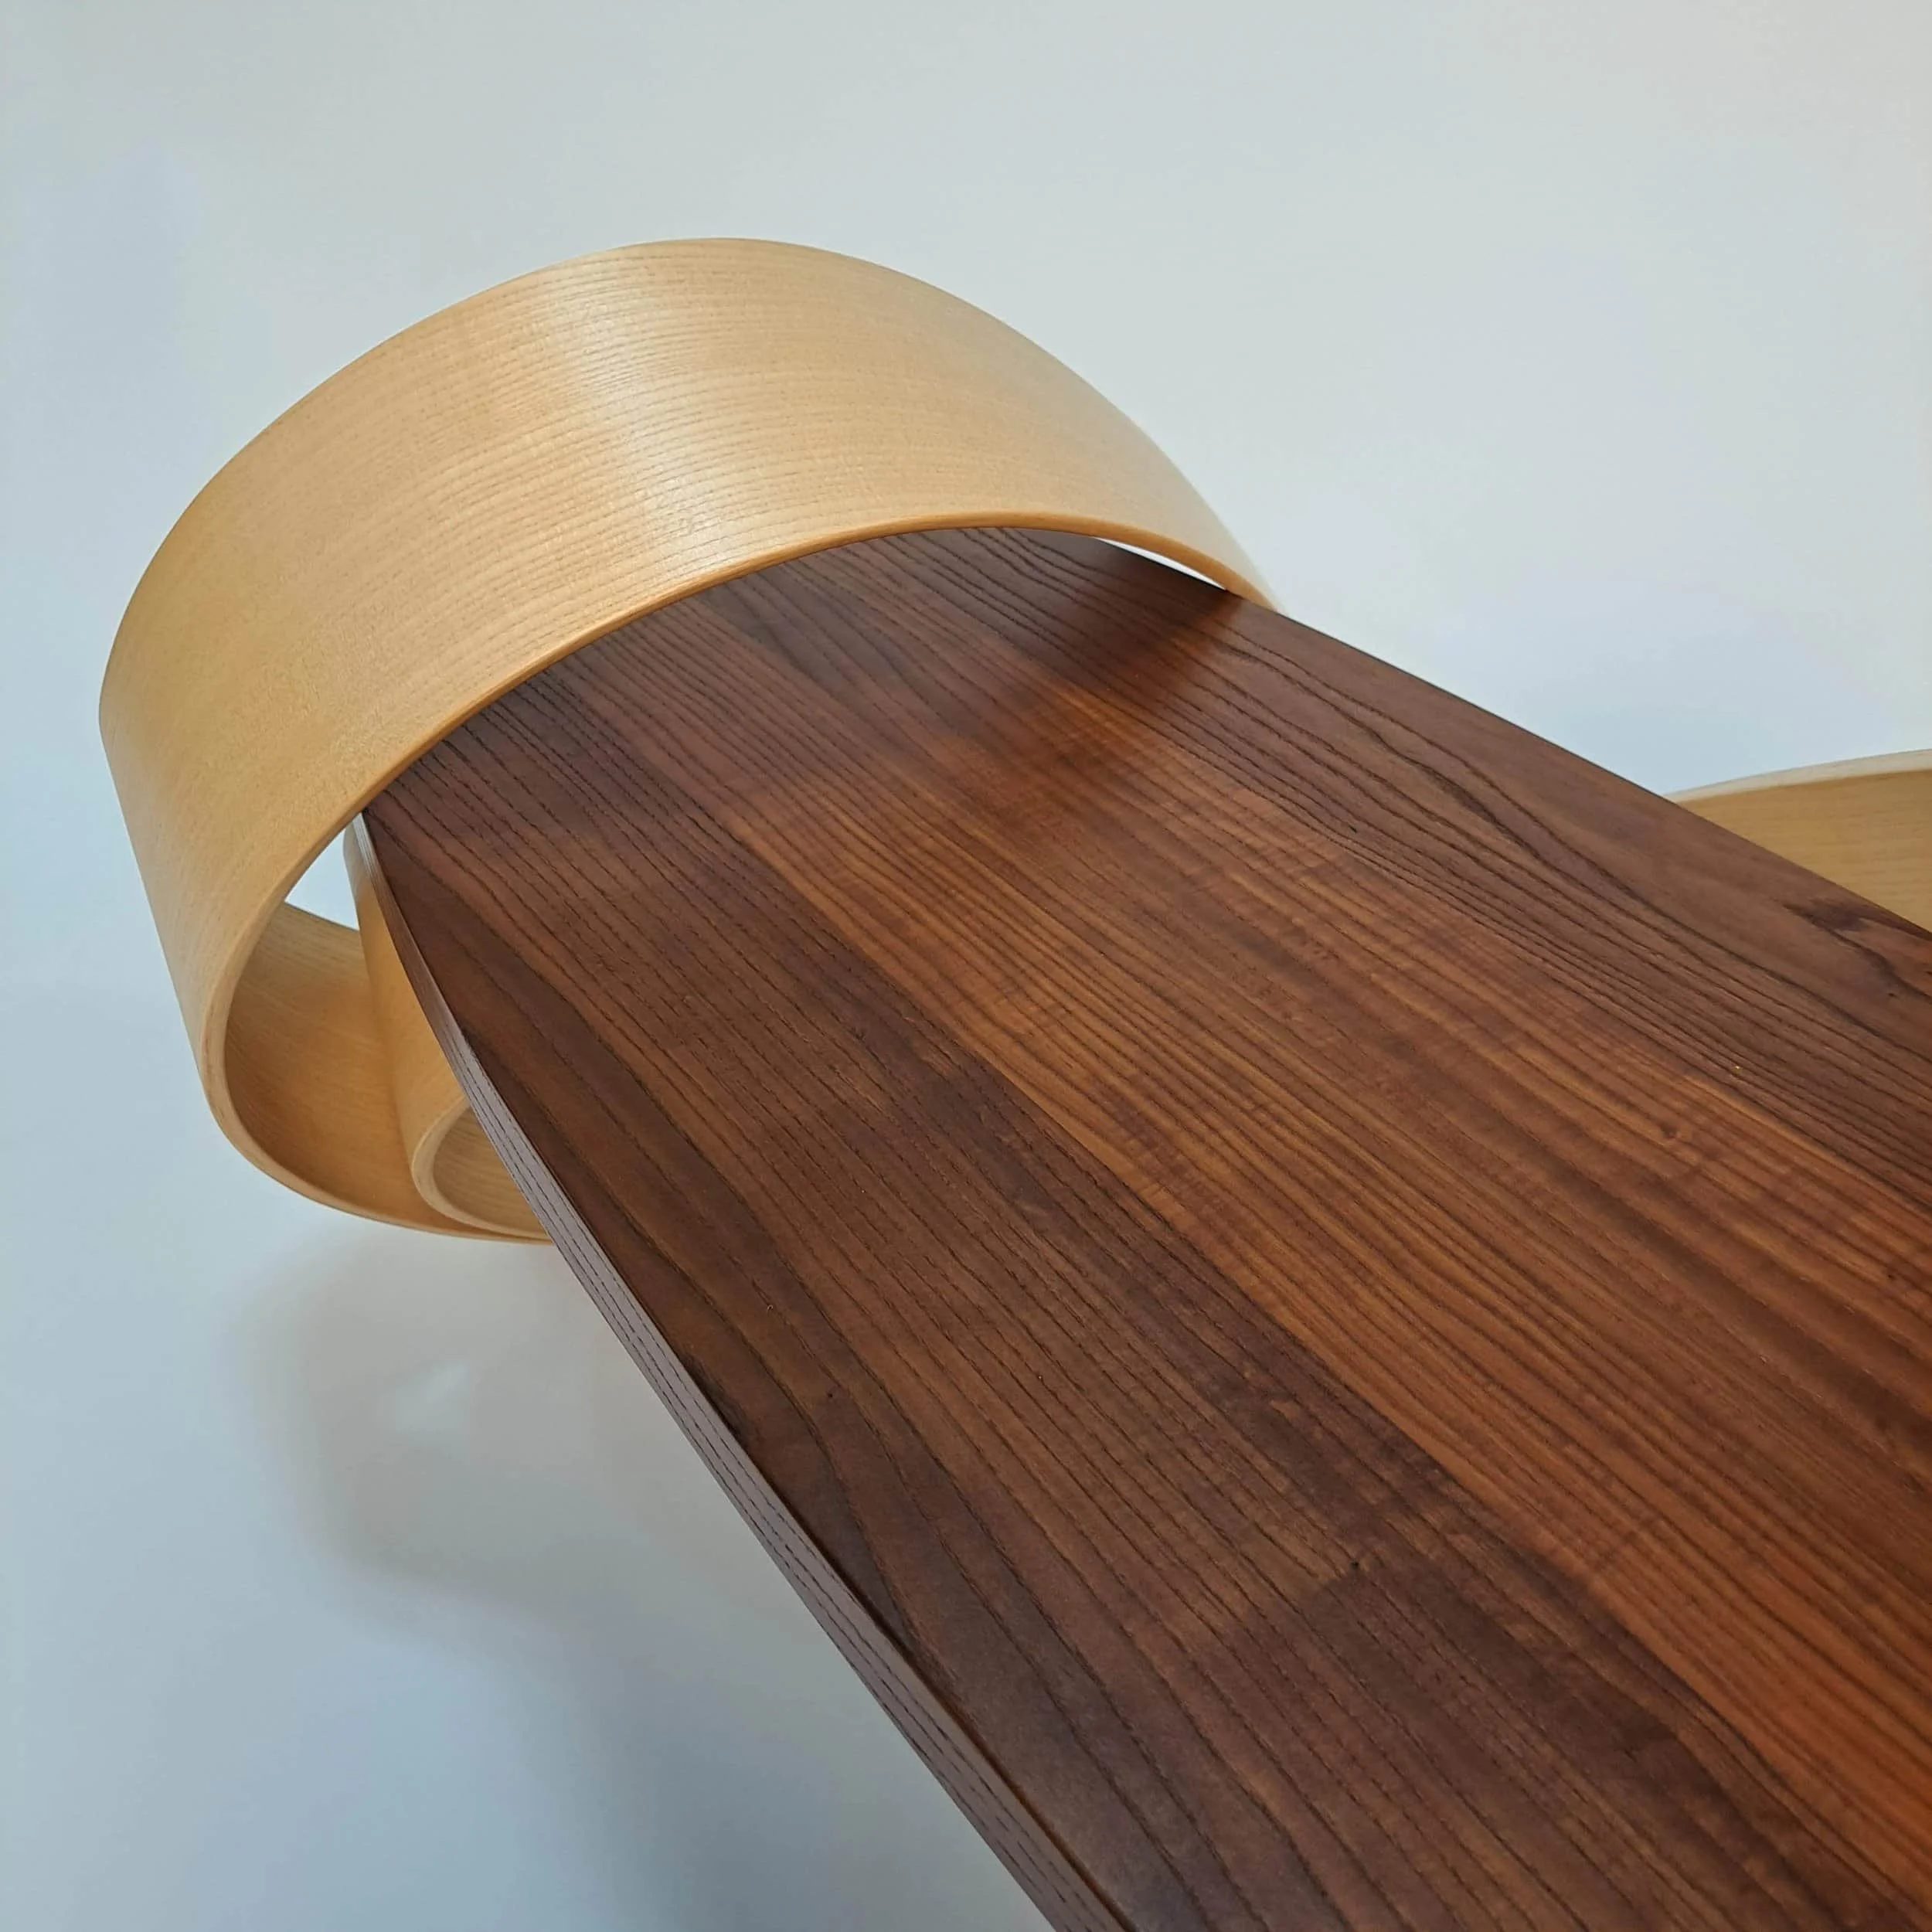
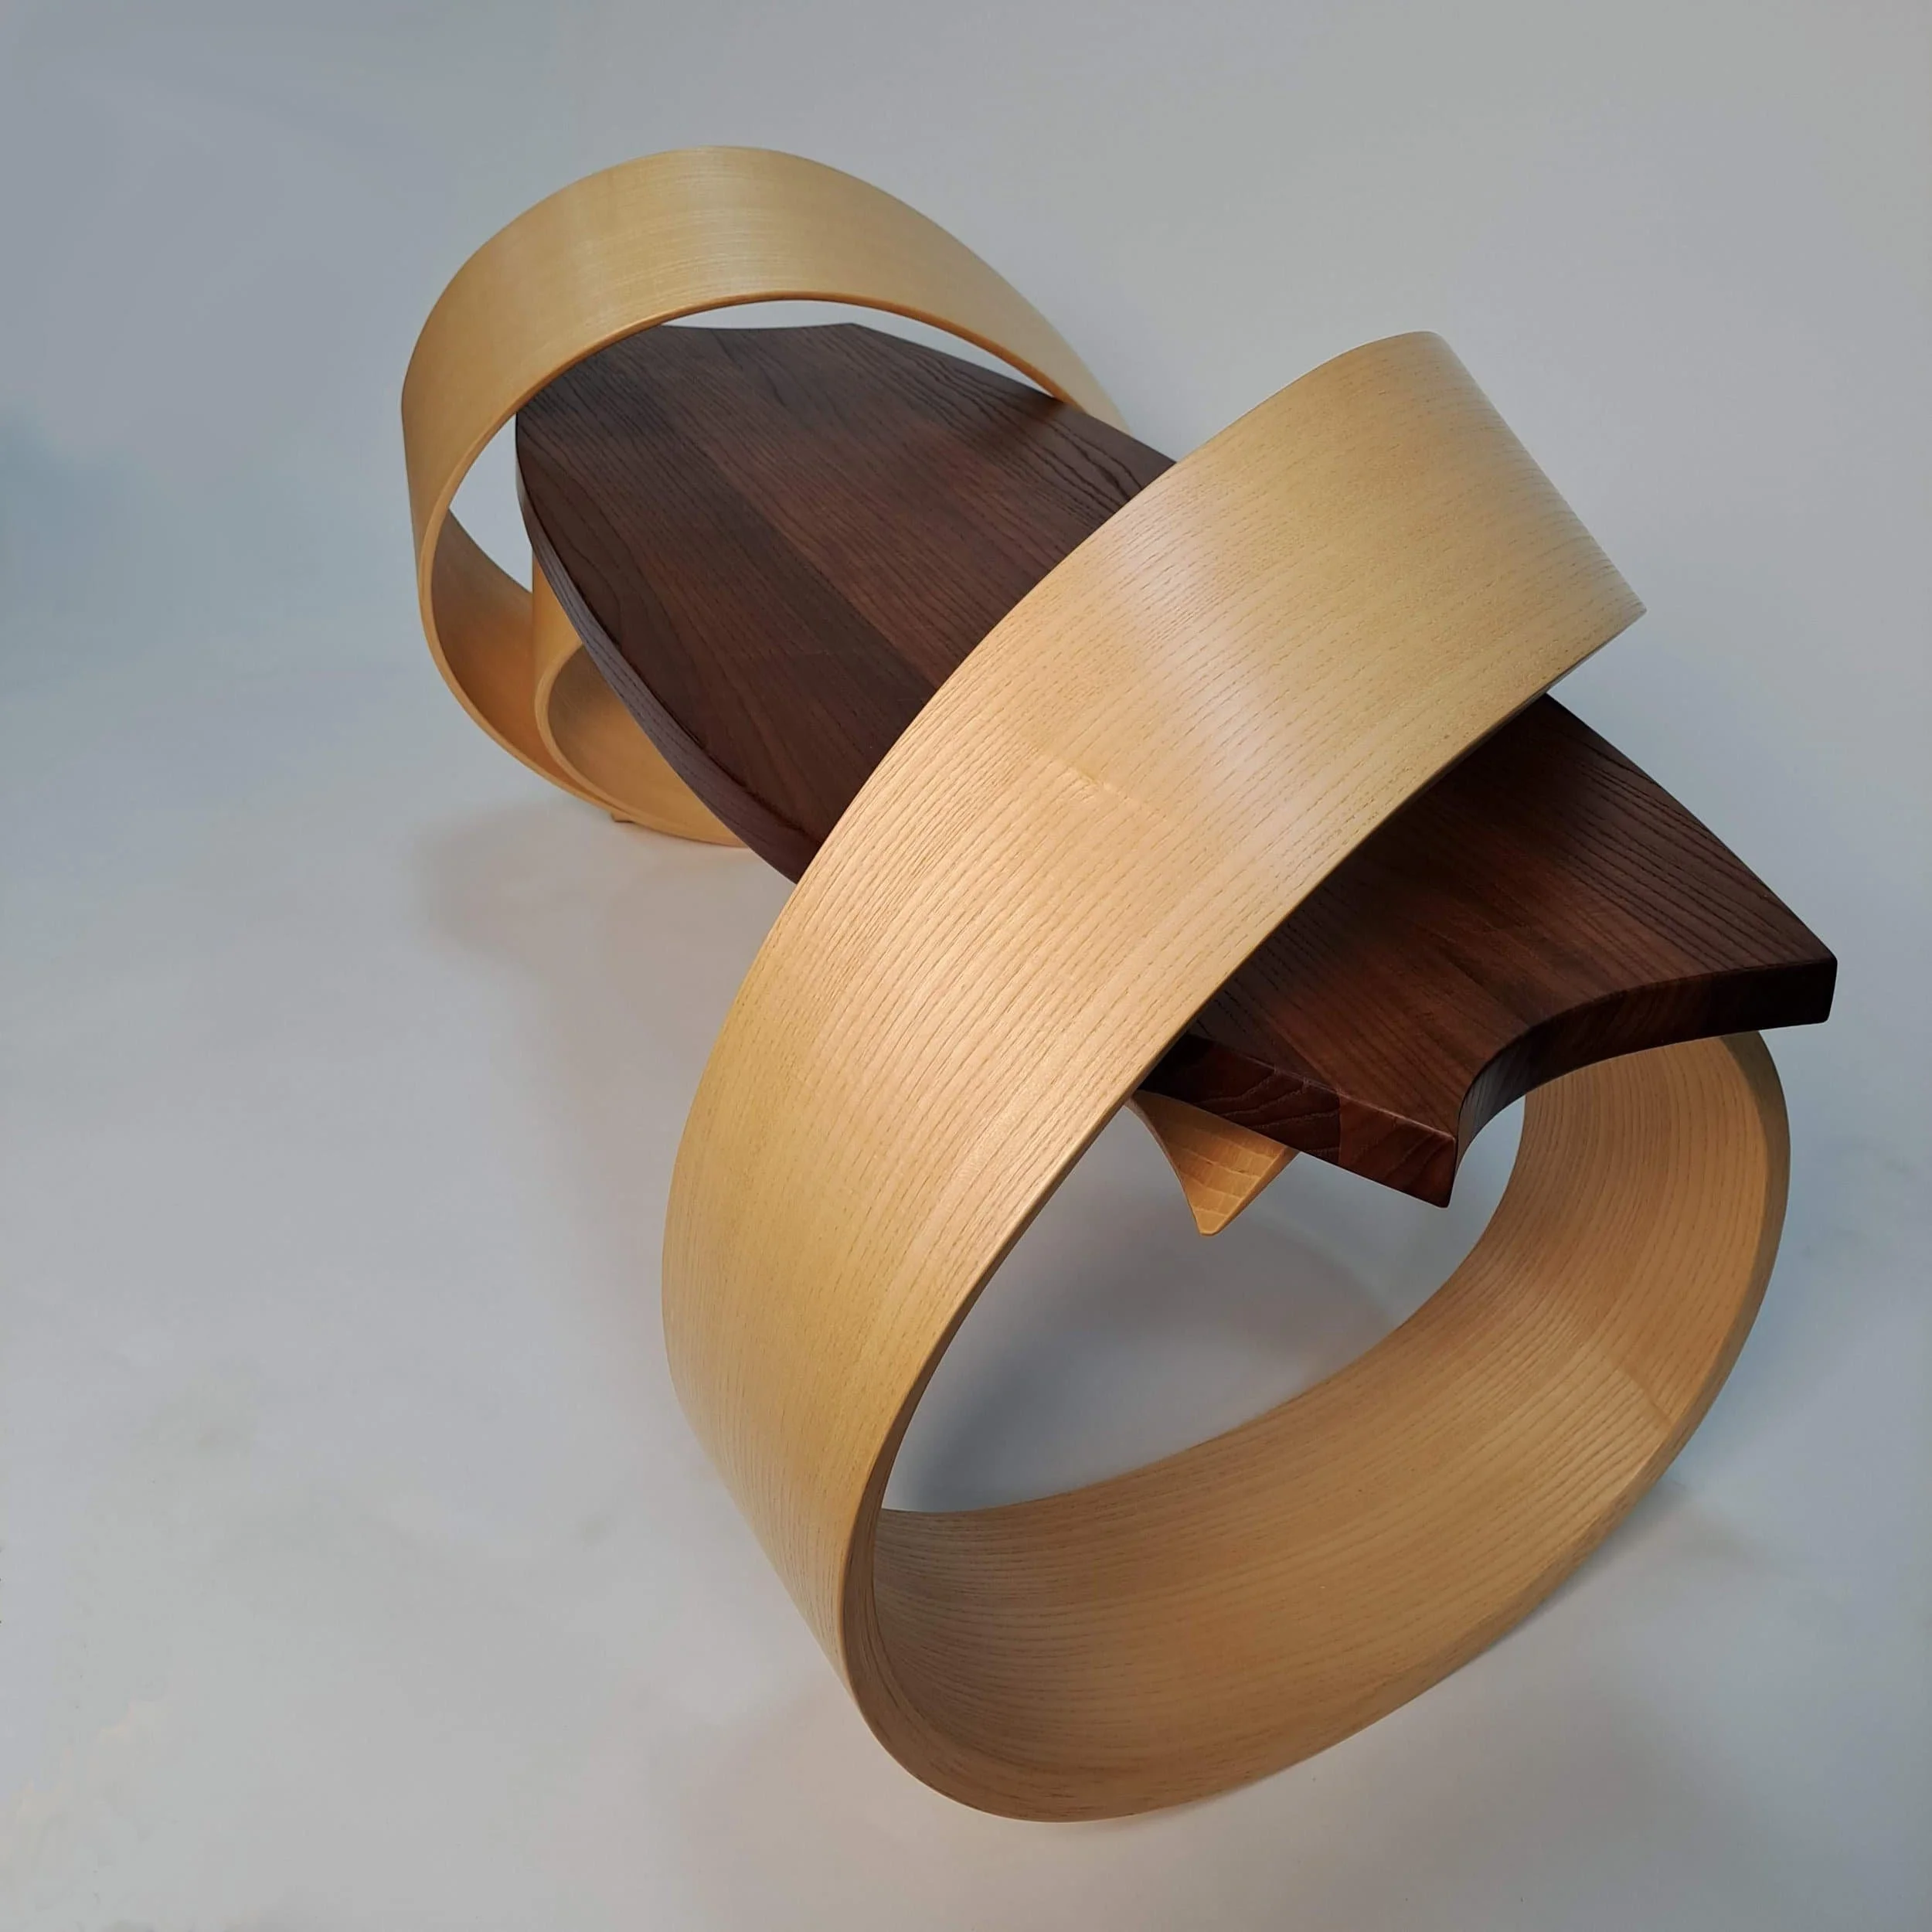
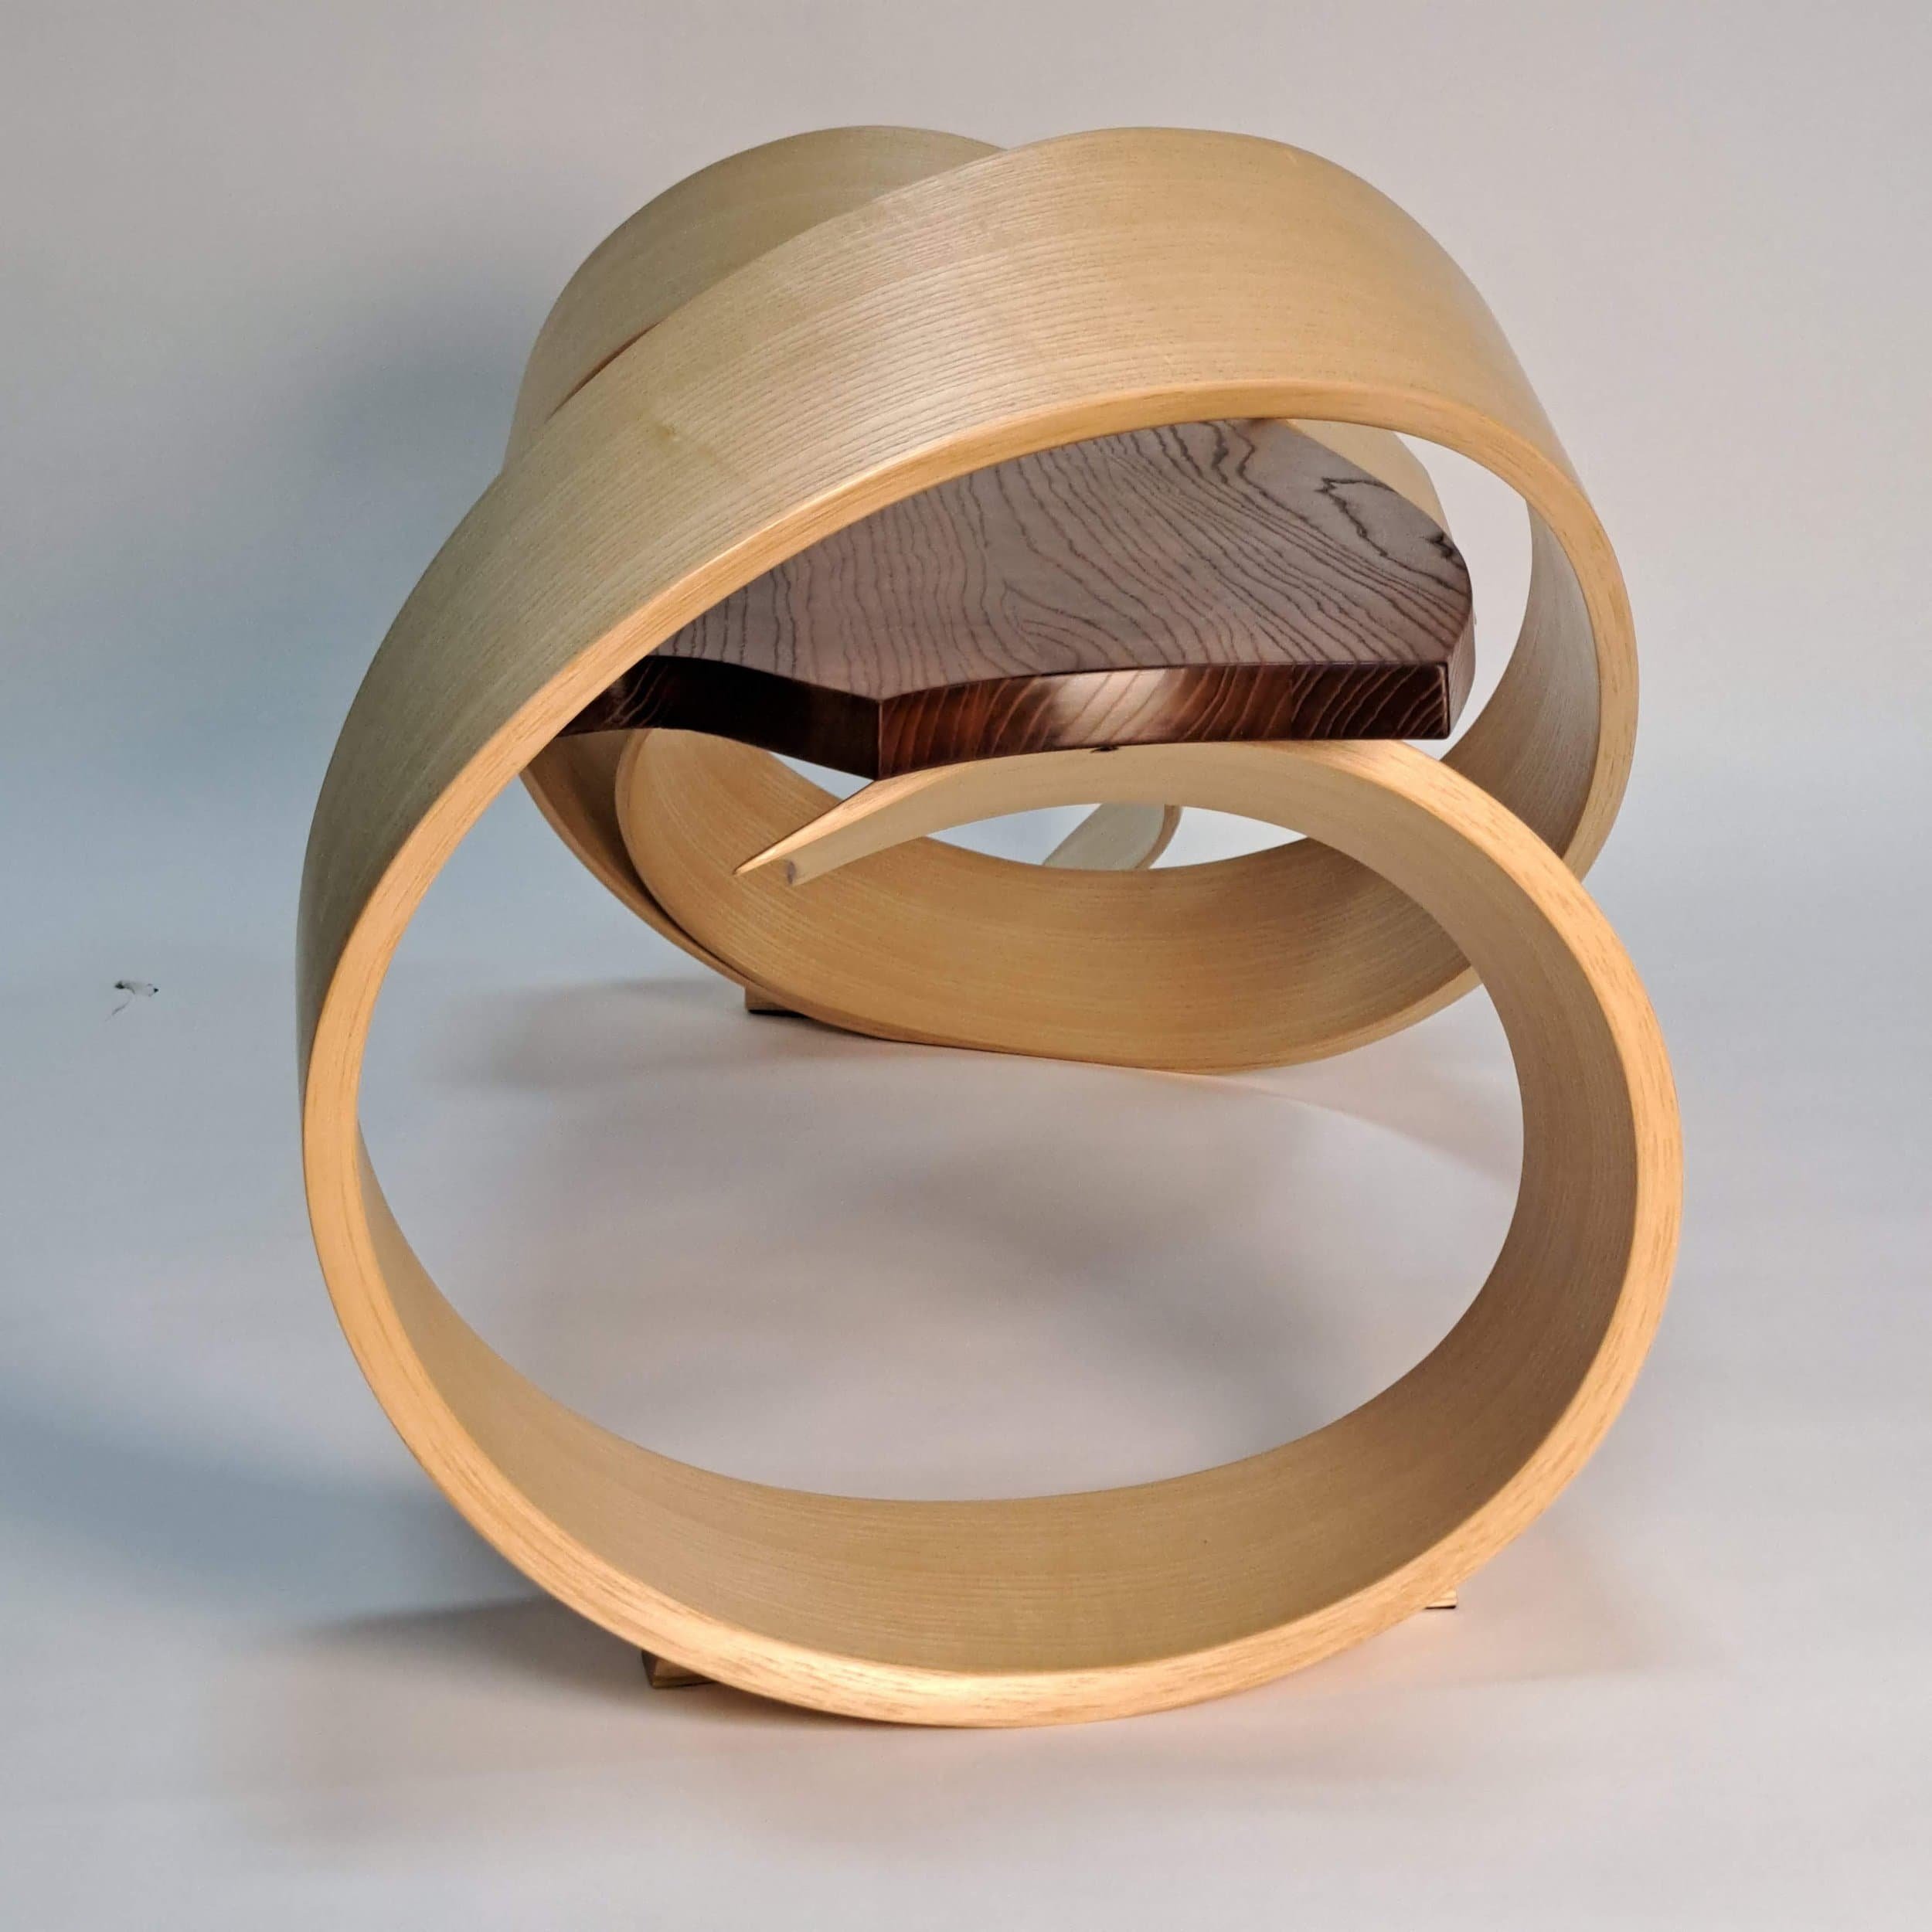
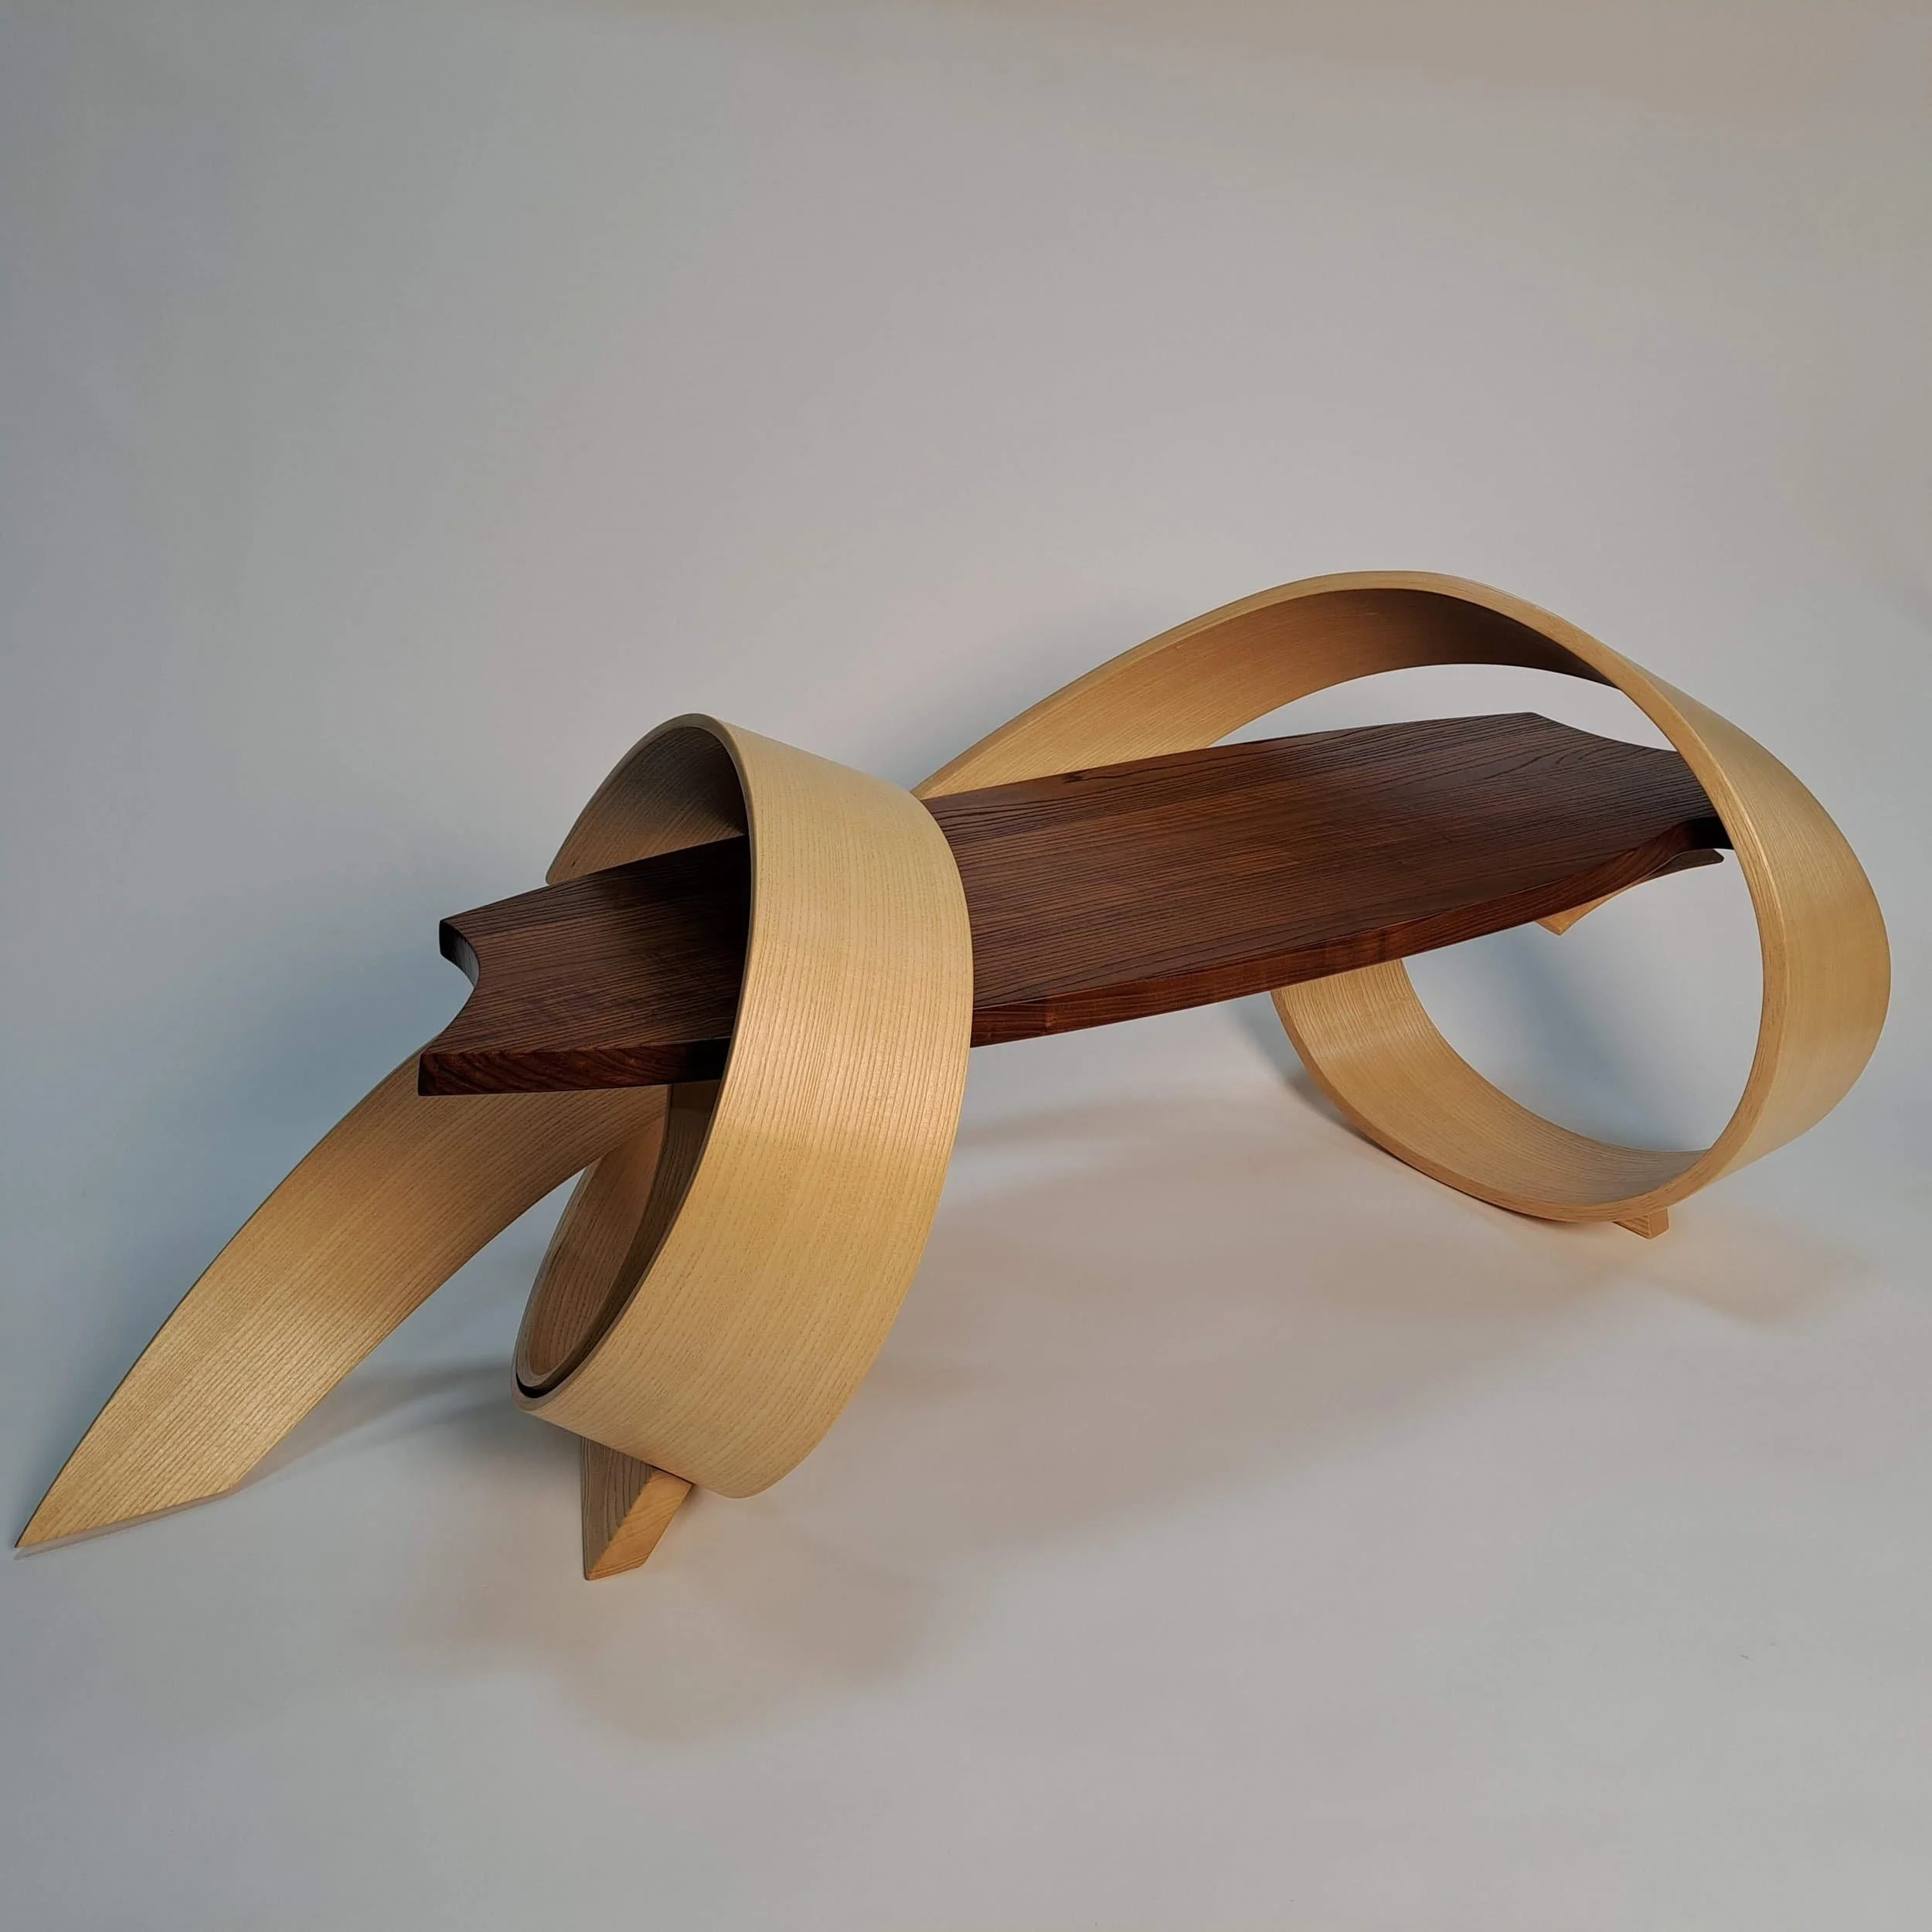
Building this free form piece was pure joy. The lines on the bench are meant to captivate and pull the eye. The design was led by what curves and undulations looked right, not by technical drawings. The bench’s single ribbon is formed from sixteen 15' long ash plies which were laminated together while bent around a framework. The seat is made of thermal ash, which is created by heating the wood to approximately 400 degrees in an oxygen free vacuum. Because there is no oxygen, instead of burning, the heat causes the sugars in the wood to caramelize, giving it the rich brown hue.
A detailed explanation of how the bench was made is provided below the Photo Gallery.
Photo Gallery

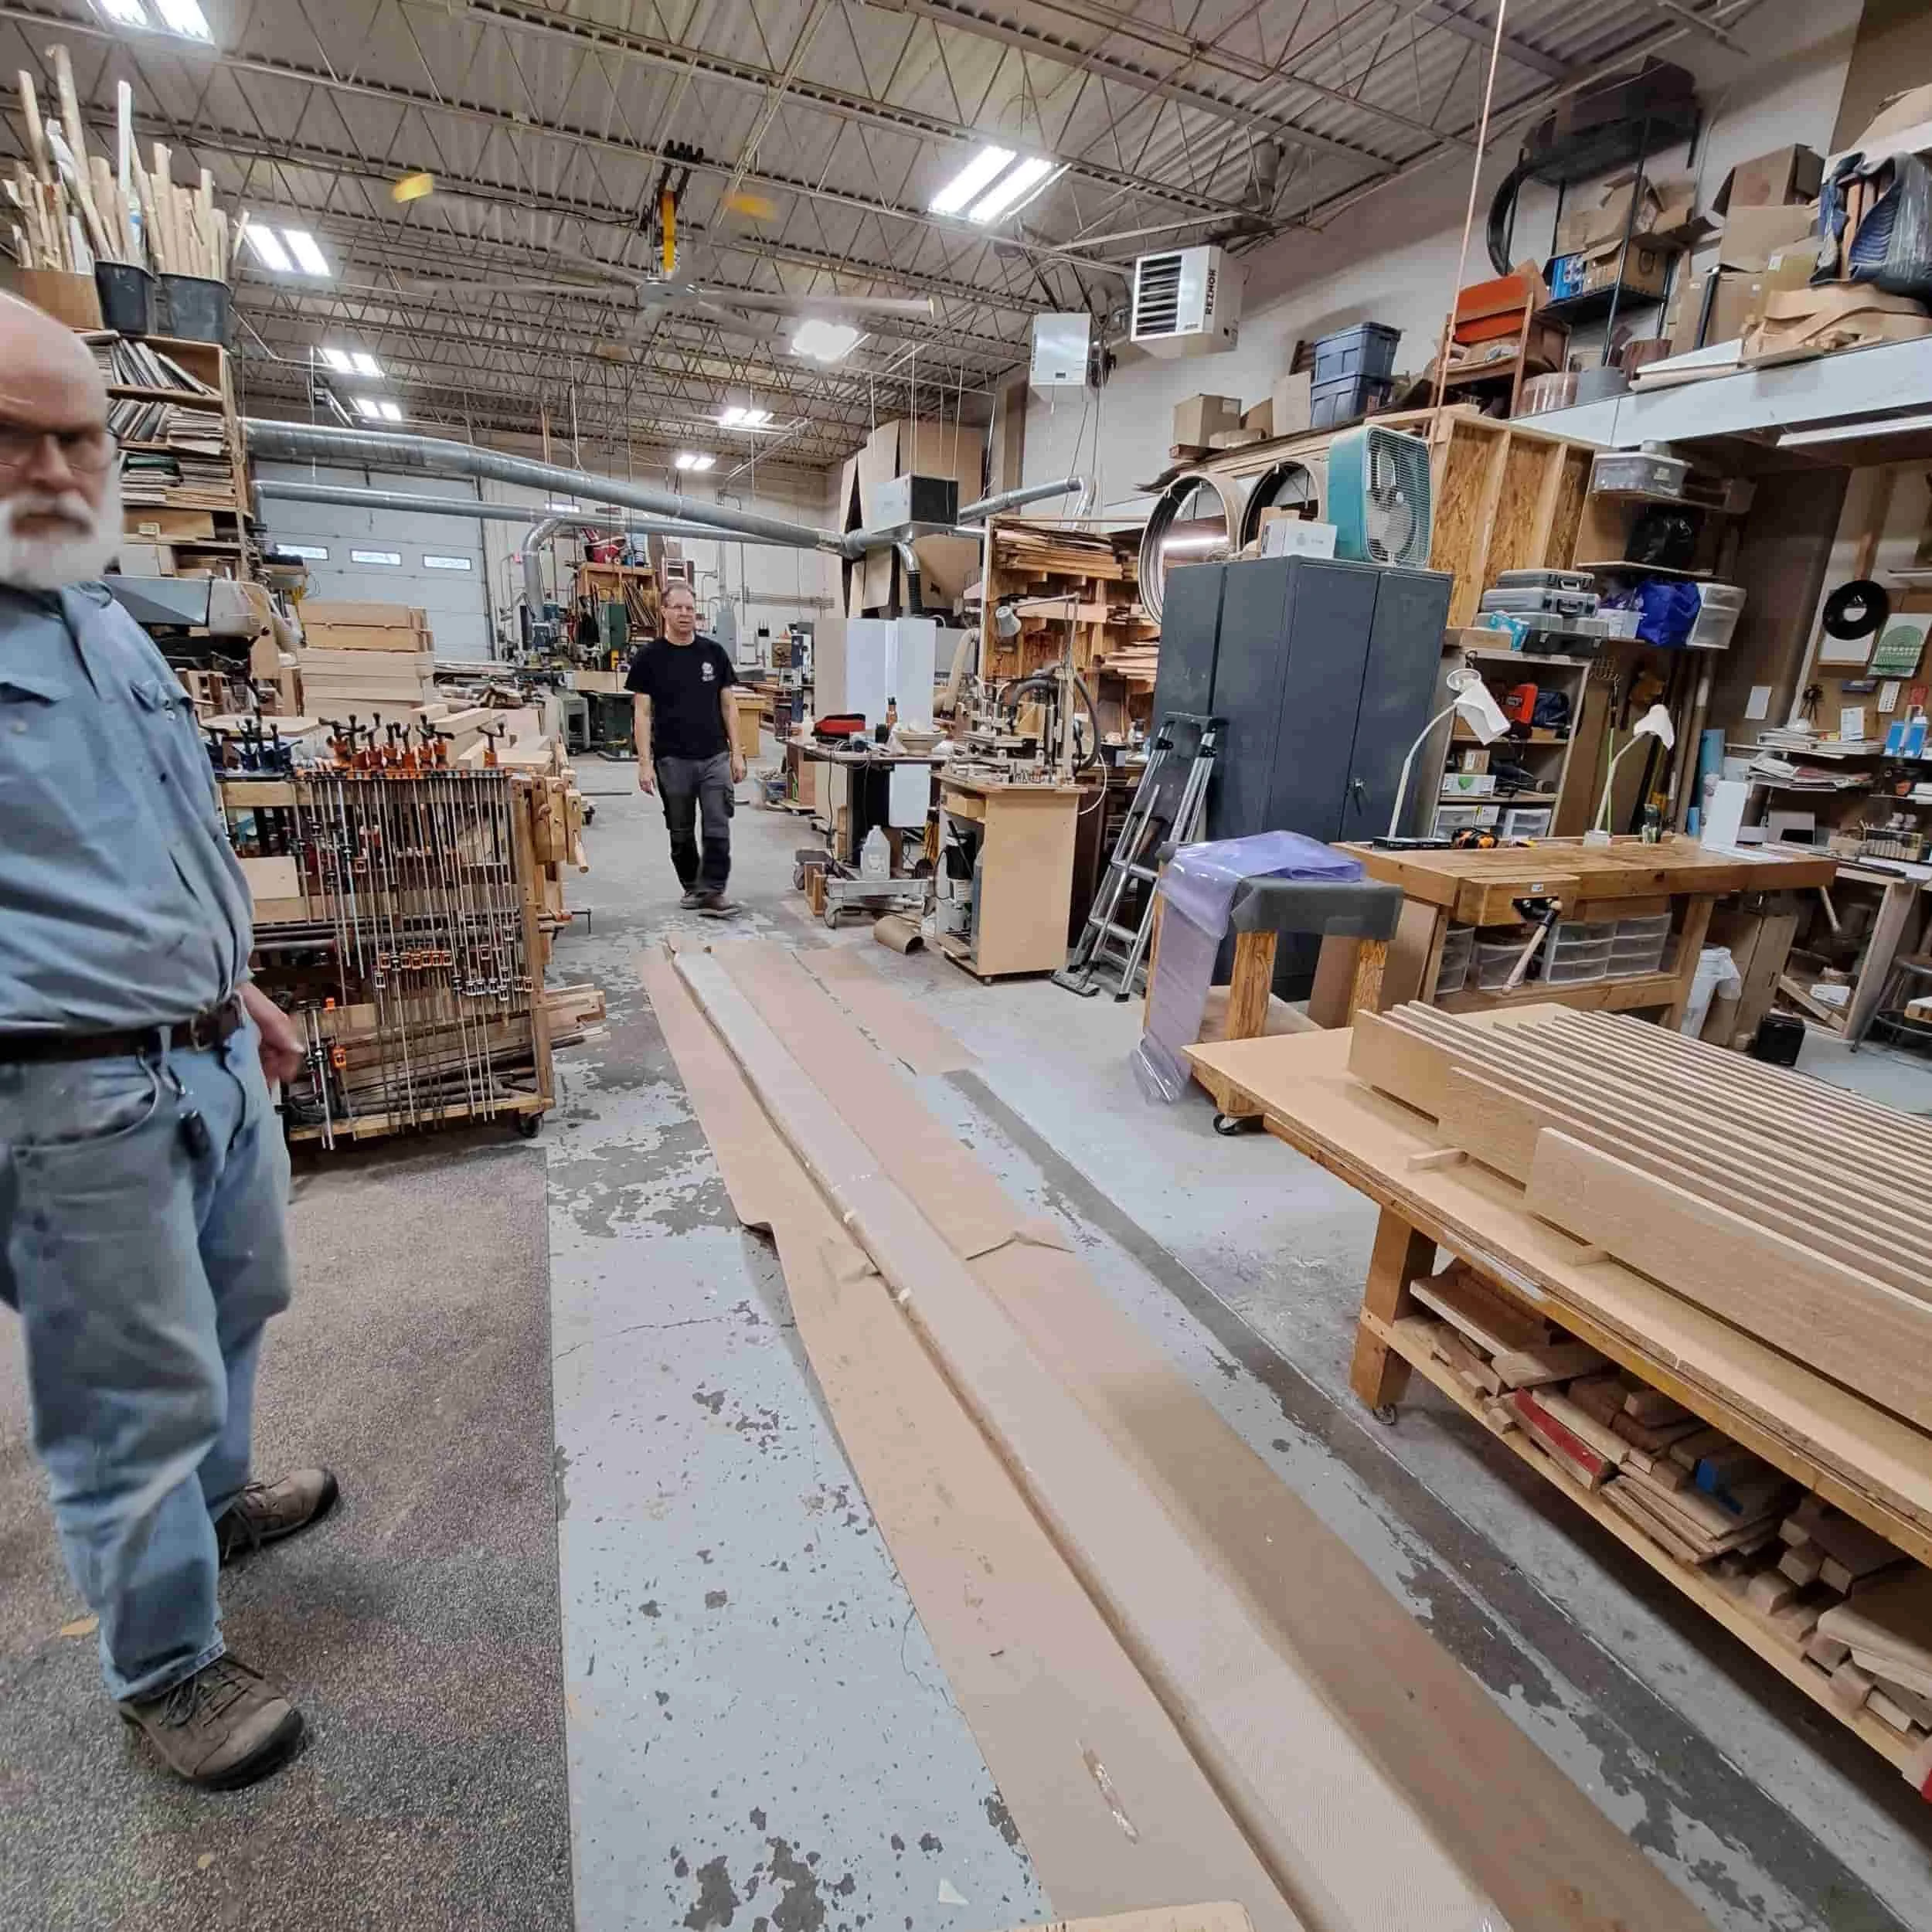
How The Bench Was Made
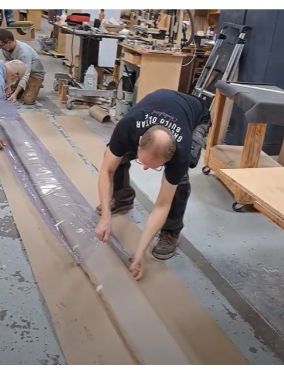
The bench’s ribbon is formed by laminating sixteen 15' long 1/16” thick ash veneer plies. Each ply is thin enough to bend easily, but when glued together they are very rigid. This is analogous to how wooden tennis racket heads were made.
Rolling on the Glue
Glue is rolled onto the plies, and the packet of glued plies is wrapped in protective kraft paper. The plies are glued together in the order they were sliced from the log, which reduces the visibility of the seams as the grain lines between the plies align.
Bagging the Plies
The packet is placed in a long industrial plastic bag.
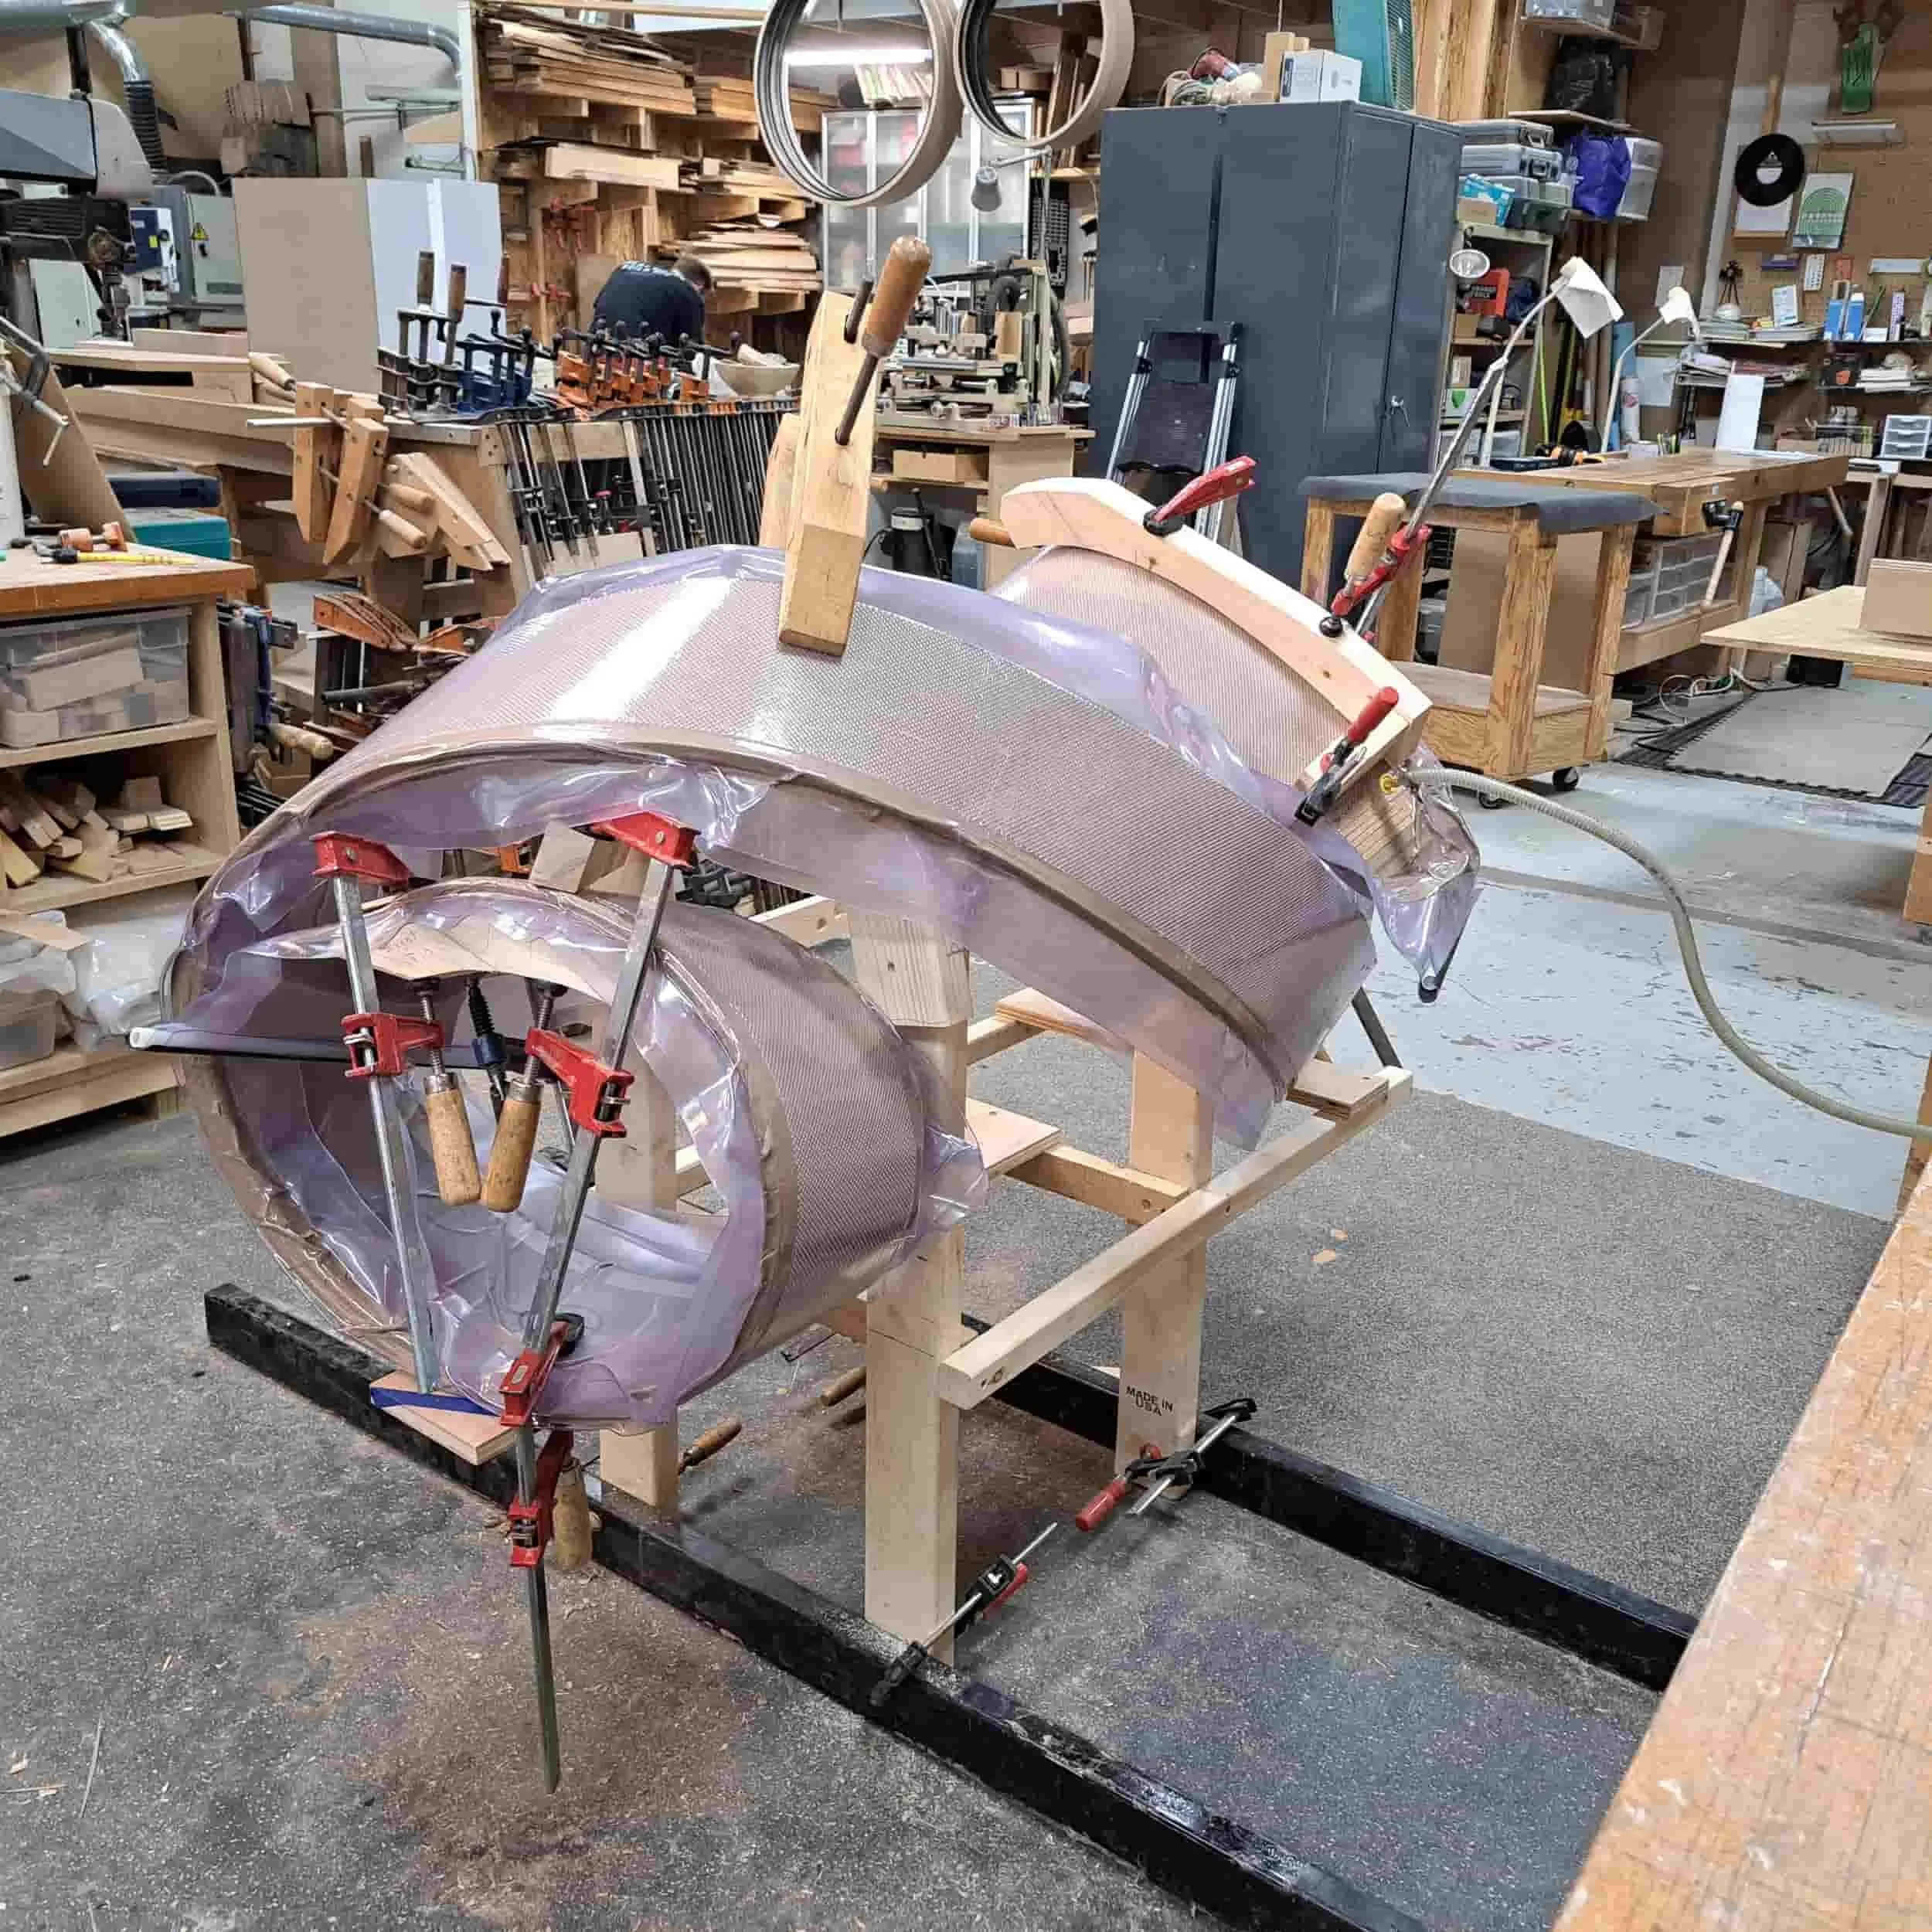
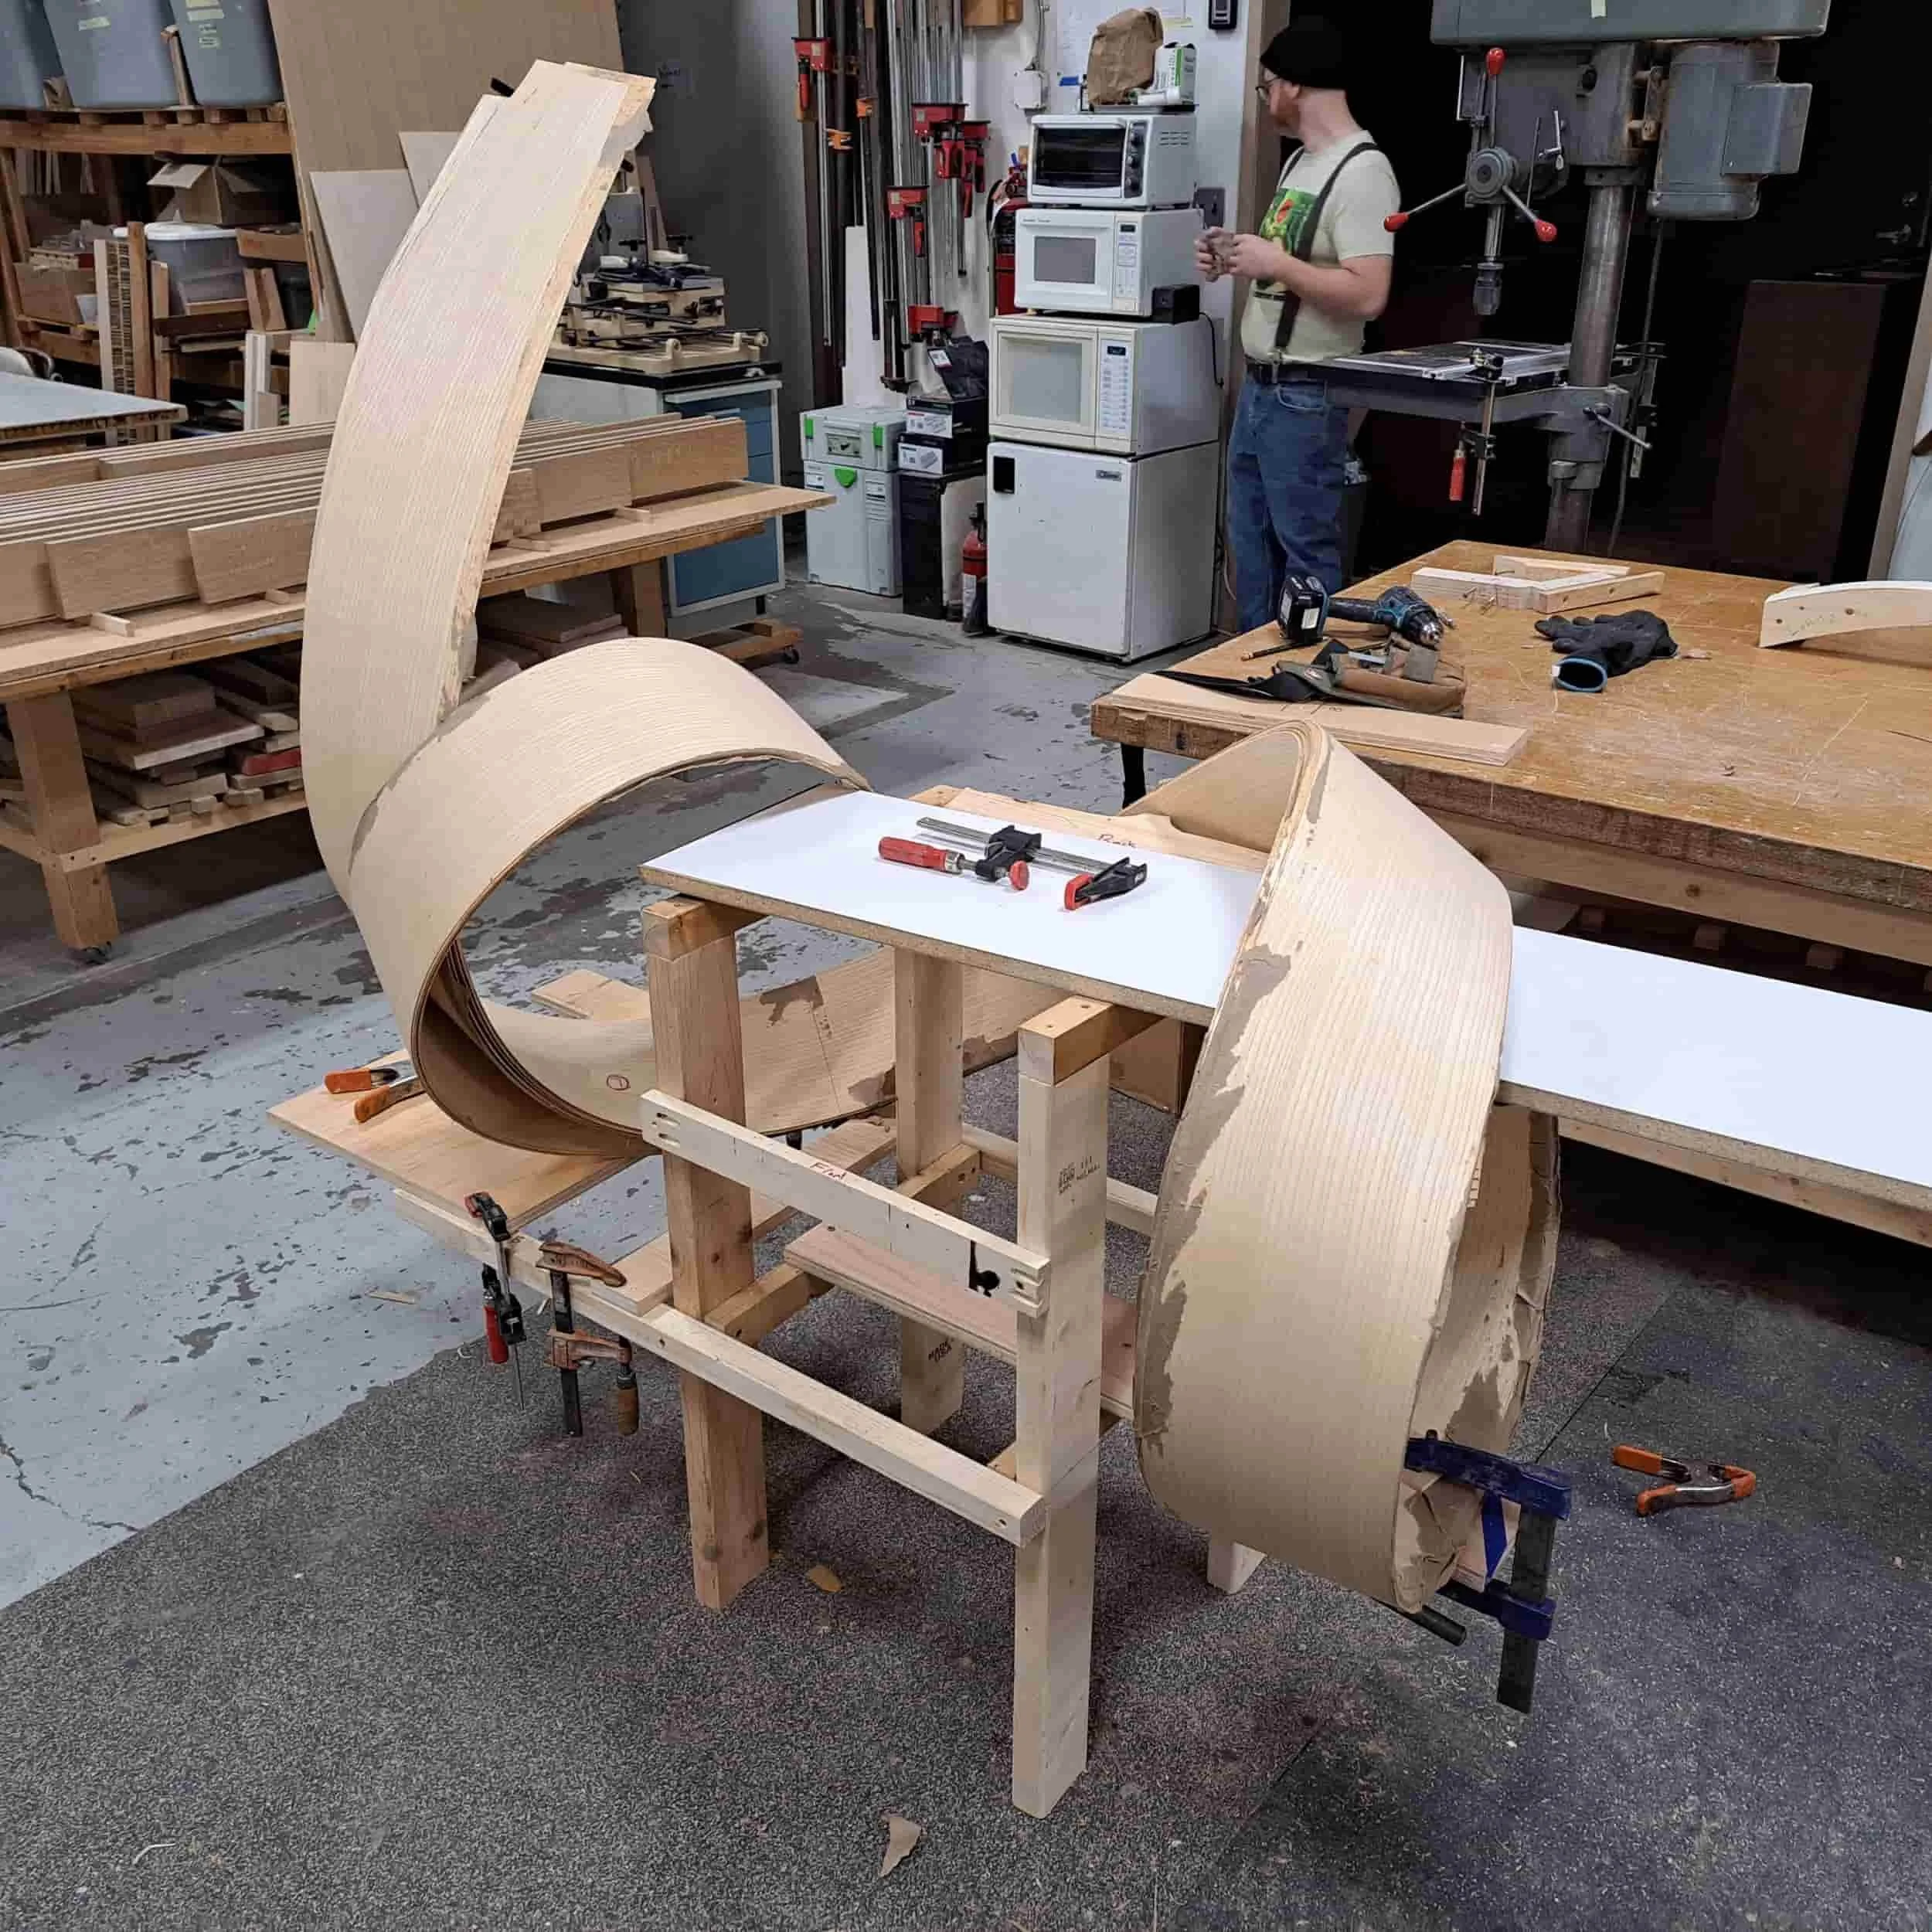
Bending the Ribbon
The bagged plies are wrapped and twisted around a scaffolding, which has contact points for the key dimensions of the bench (e.g. height of seat, length of bench, etc.). The exact form of the curves and twists is done by eye and feel. Multiple test runs are made with unglued plies to determine the best form. This is an organic process; how does the wood want to bend, what looks and feels like natural curves.
Once the correct form is shaped, a vacuum pump evacuates all the air from the bag. This causes atmospheric pressure to press the plies together while the glue cures (think of home food vacuum sealing).
Unbagging the Ribbon
When the glue cures the ribbon is removed from the bag. The left tail of Whip-it bifurcates. Half the plies are glued their entire length while the left end of half the plies are not glued. You can see them flopping upward in this photo.
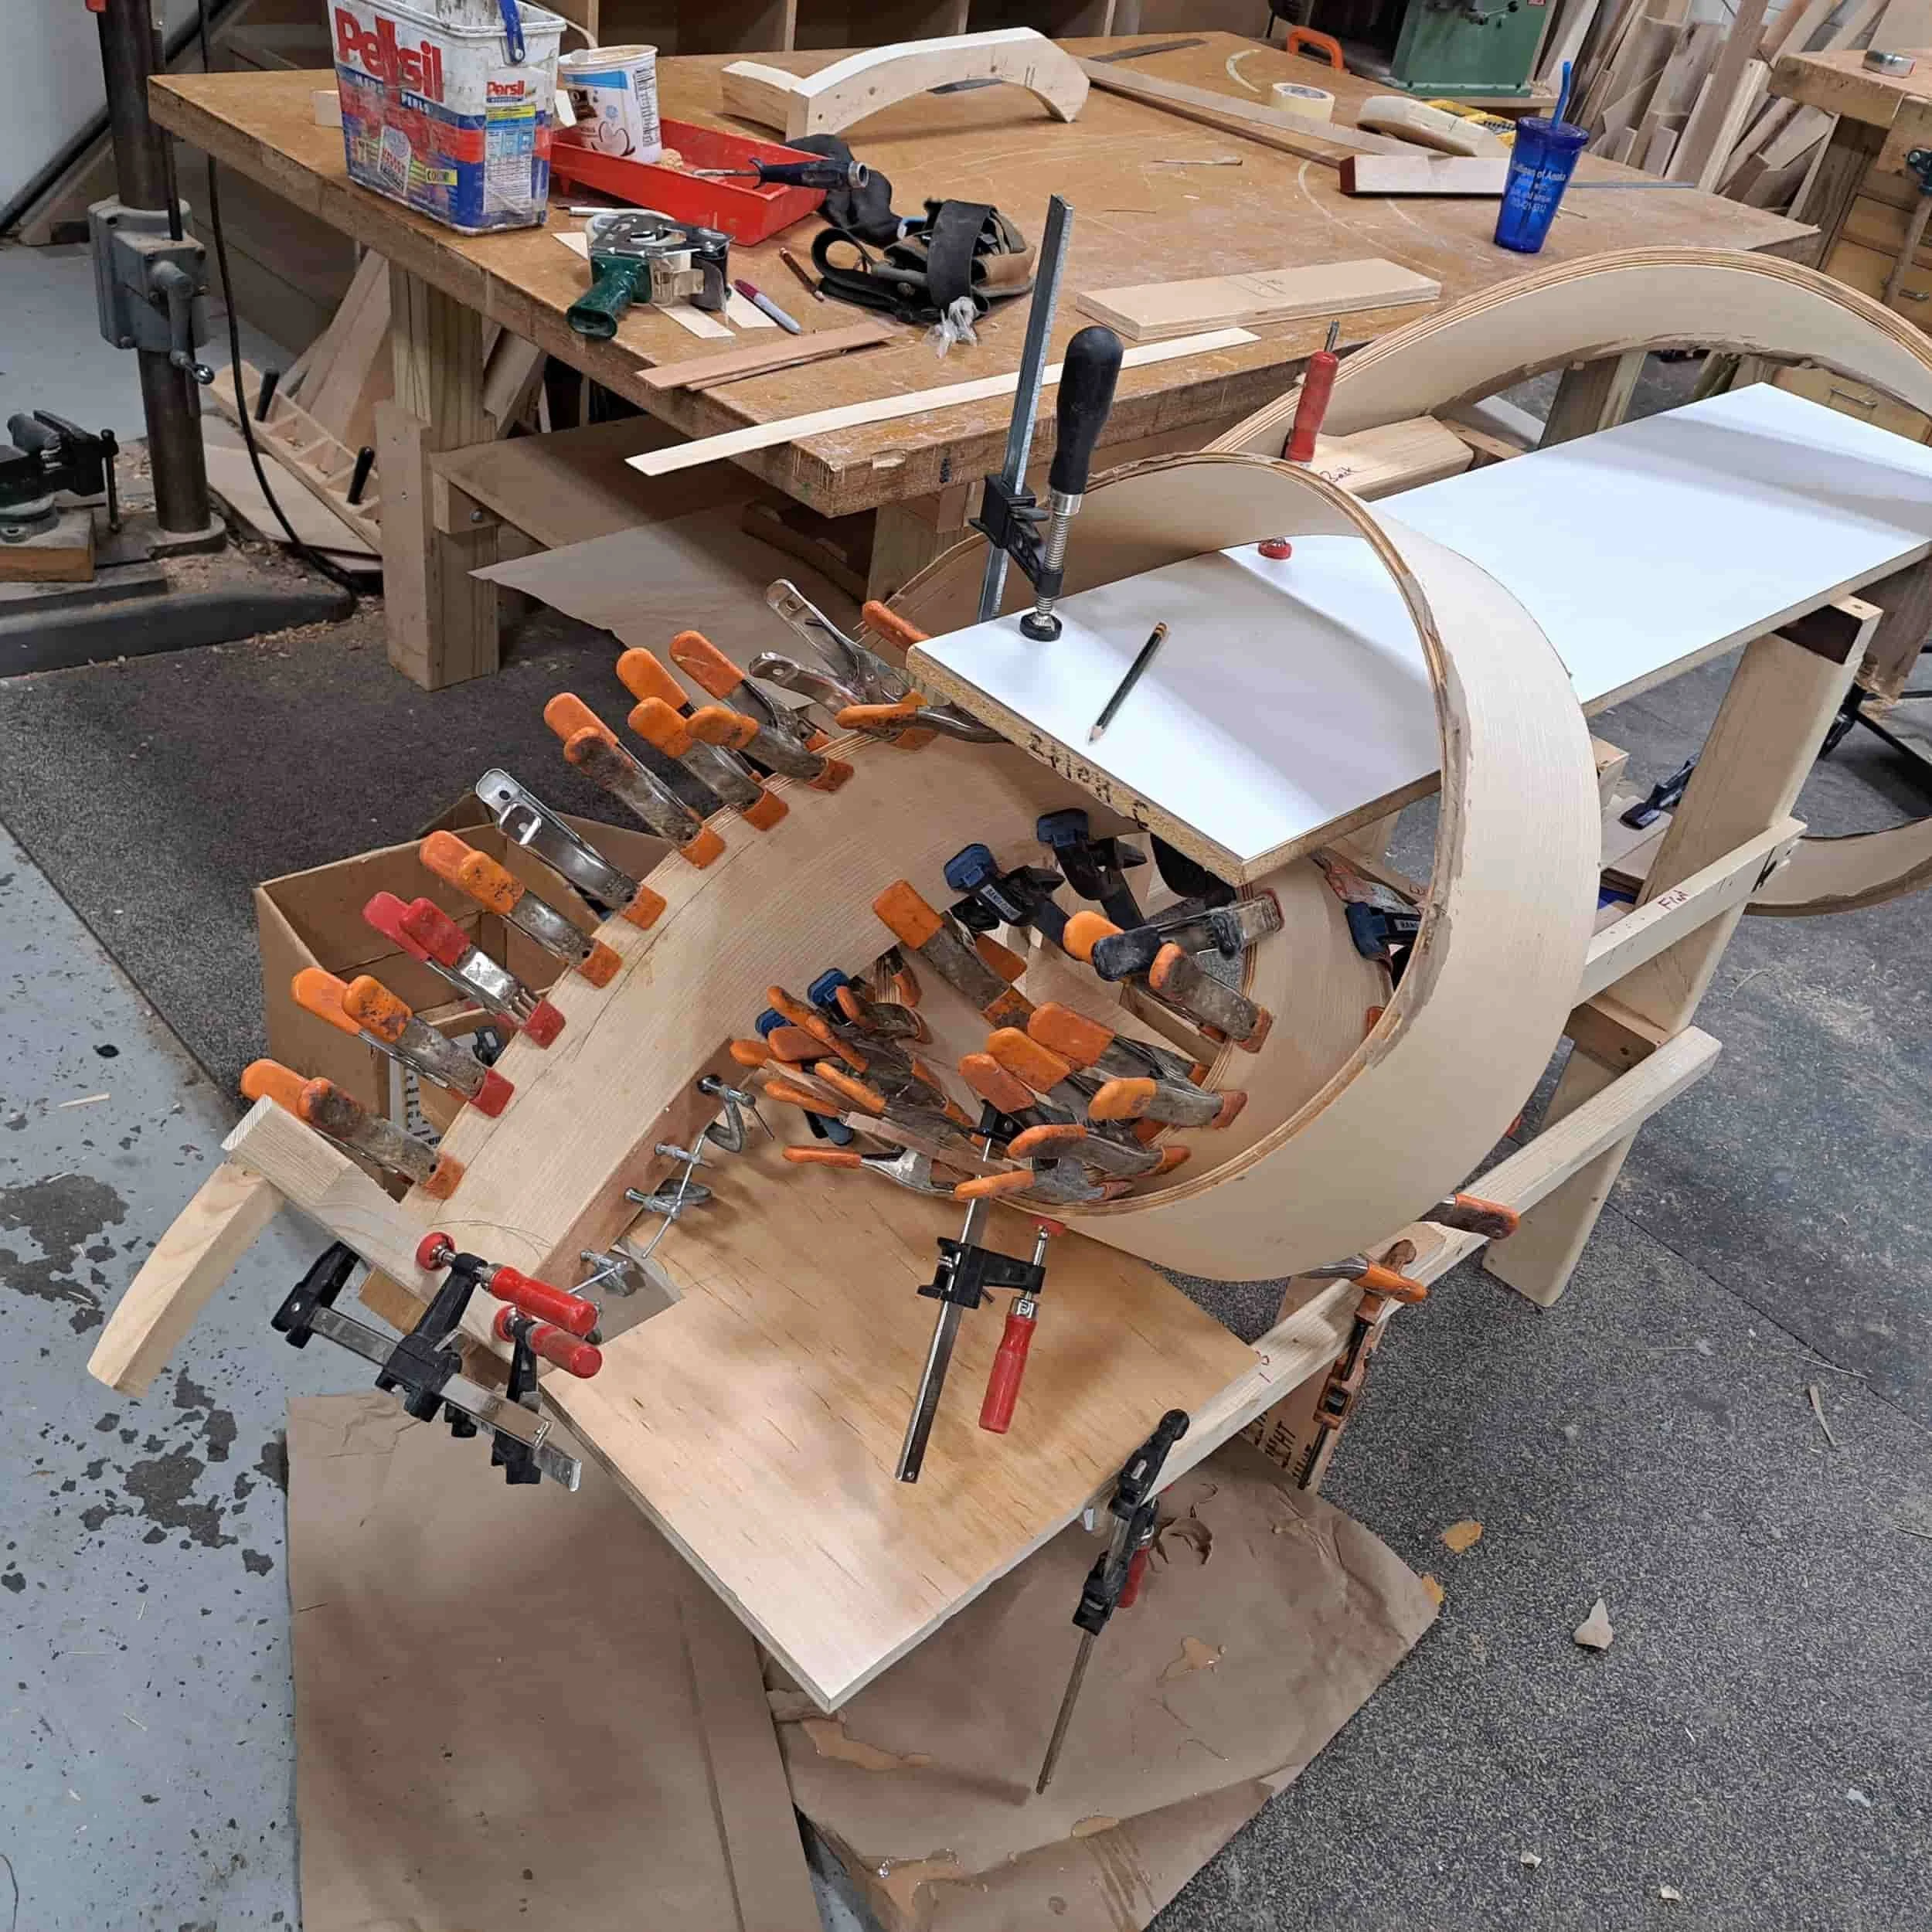
Biofurcated Tail
The loose plies are manually twisted, glued and clamped to form the floor touching portion of the tail.
Completing the Ribbon
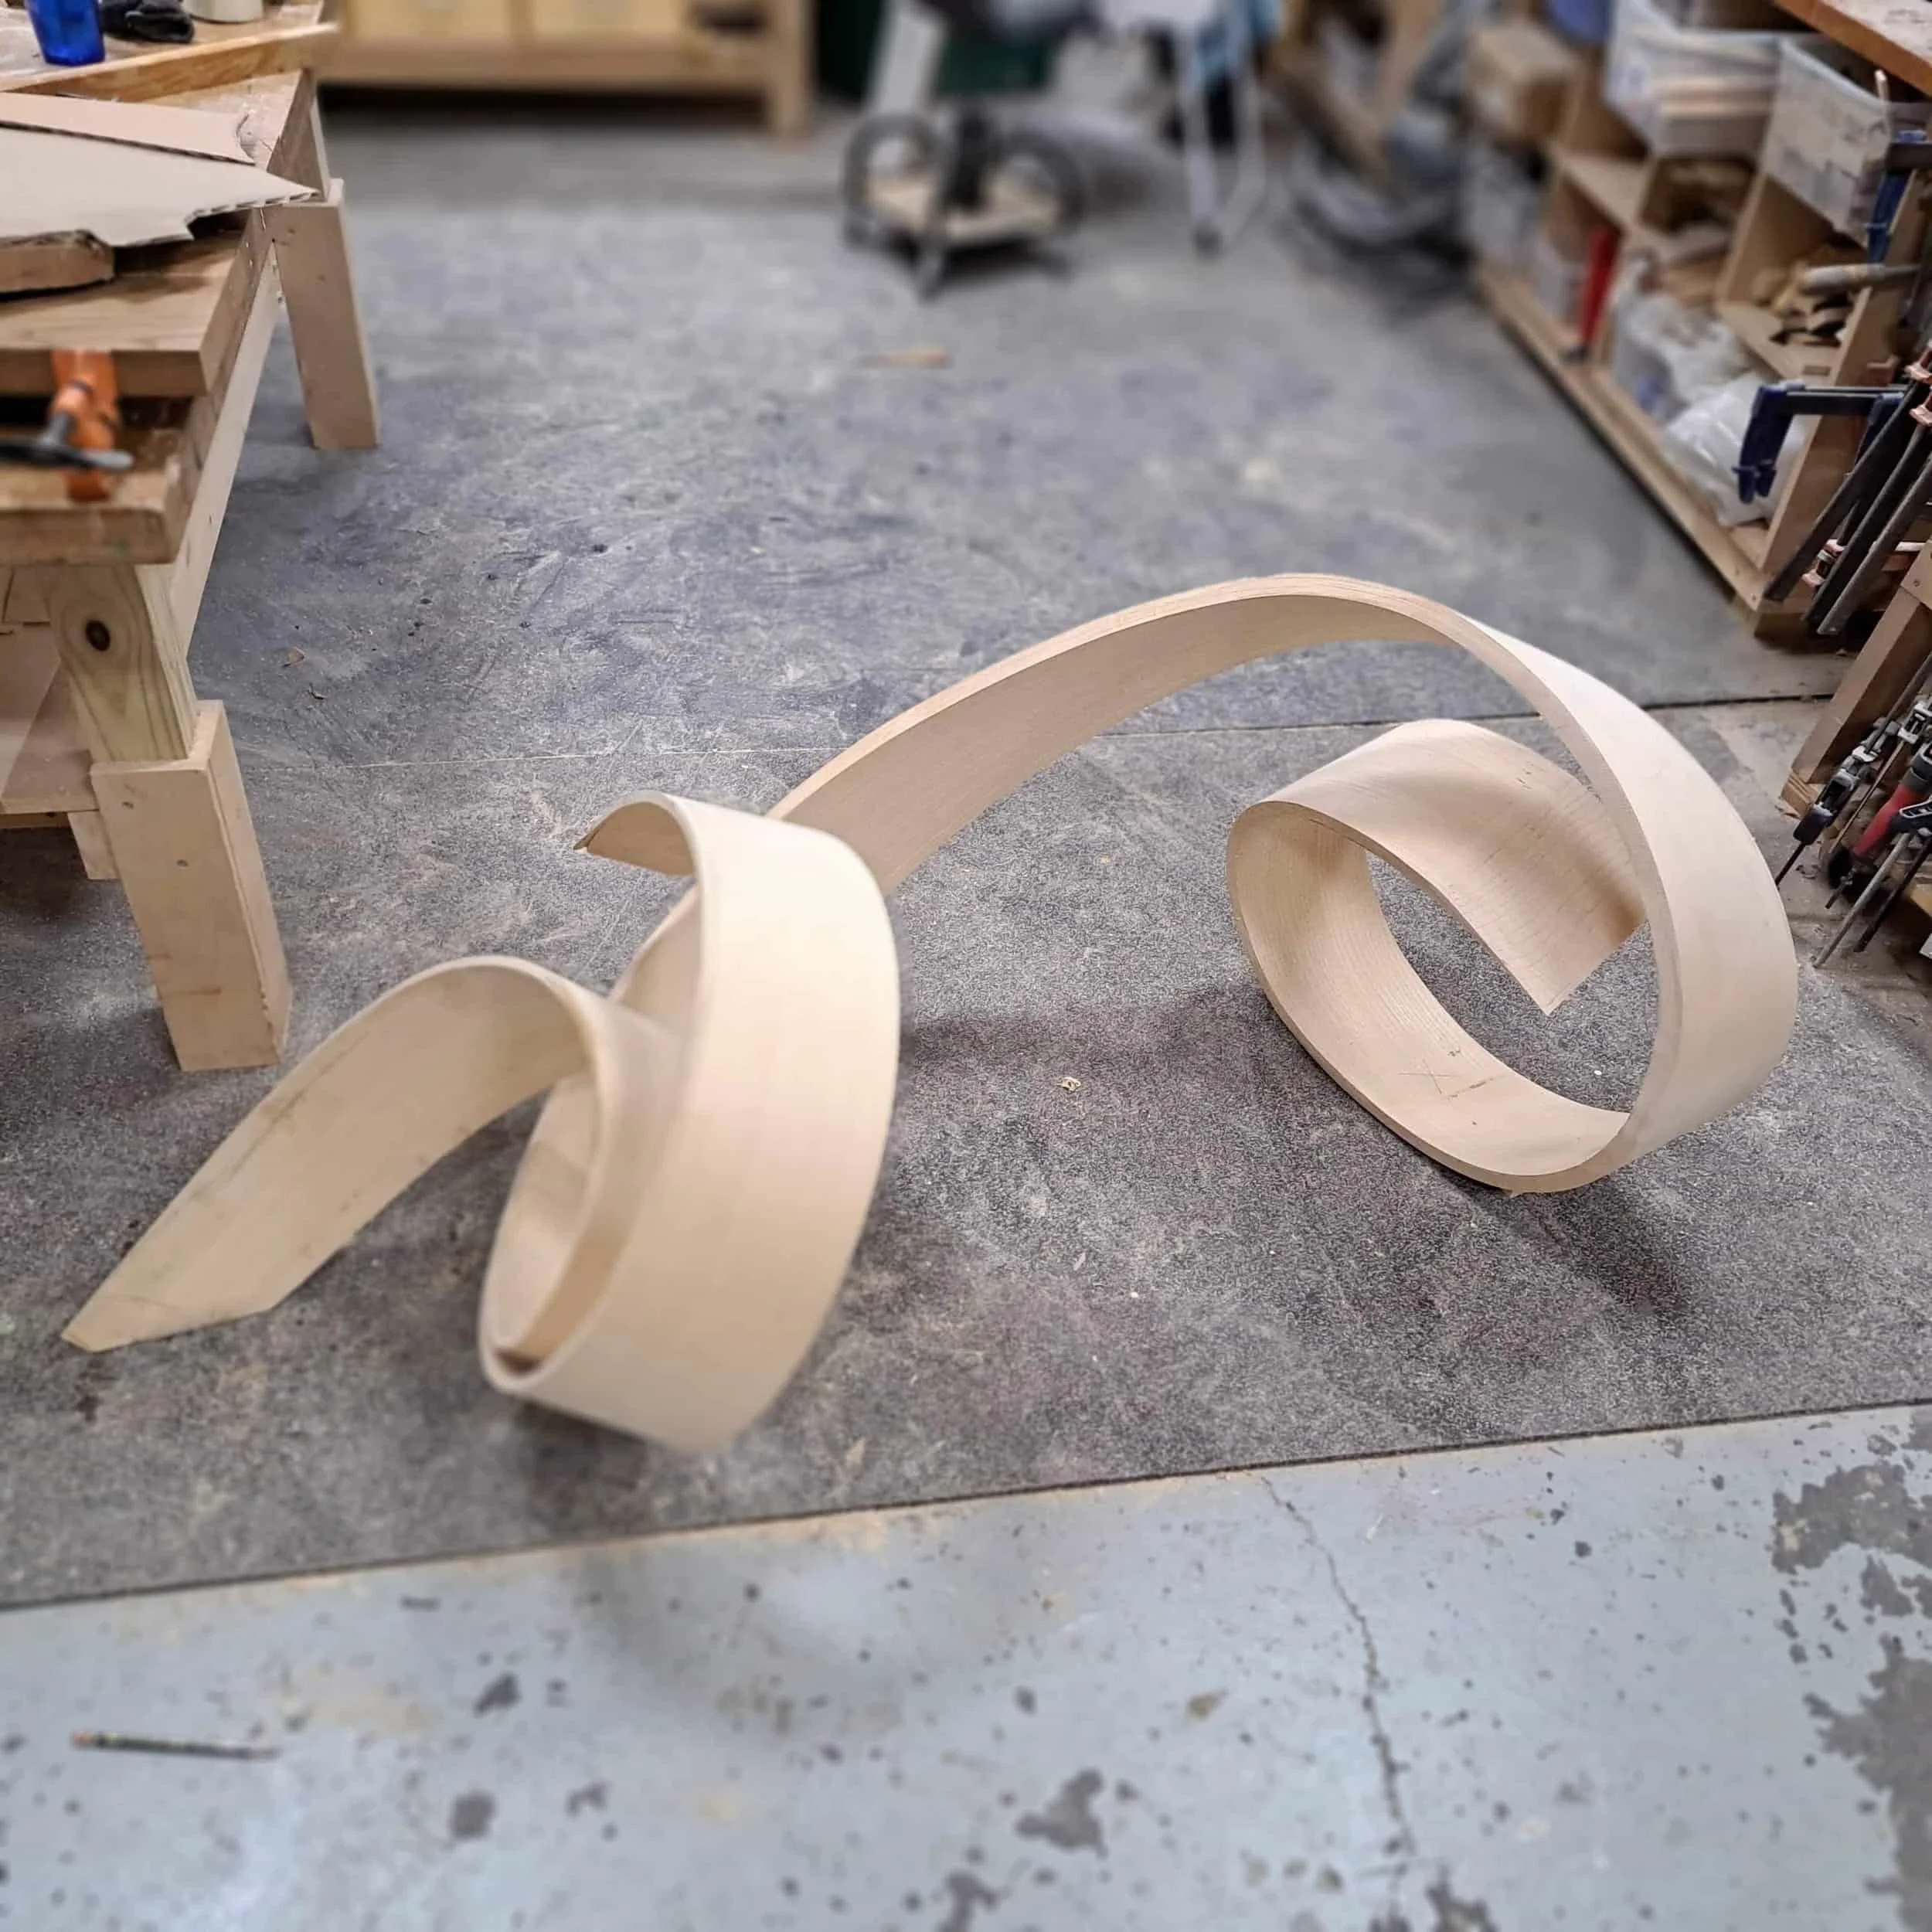
The last step is to shape and smooth the edges of the ribbon. This is done with spokeshave, planes, rasps and sandpaper.